
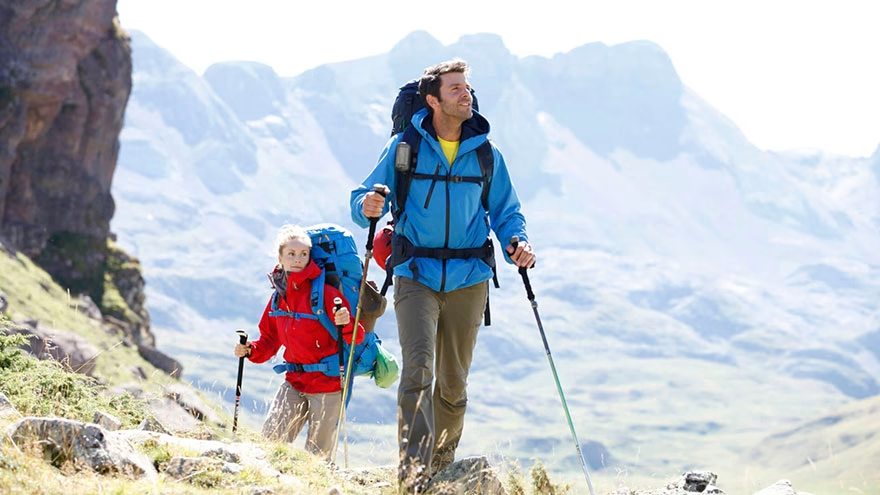
Walking Poles Should Feel Natural
Walking poles are useful when they add rhythm, balance, and support without making your shoulders tense. If they feel like two awkward sticks you are dragging along, the length, strap setup, or timing probably needs work.
Start on flat ground before using poles on hills. Learn the basic pattern while the trail is simple, then adjust for climbs, descents, rocks, and long traverses. A few minutes of setup can change the whole walk.
The poles should help your stride, not interrupt it.
Set the Pole Length
On flat ground, adjust each pole so your elbow sits near a right angle when the tip touches the ground beside your foot. This is only a starting point, but it works for many walkers and hikers.
REI's guide to trekking poles recommends changing length for terrain, including longer poles for long downhills and uneven sidehill travel. That matters because one setting does not fit every slope.
Length matters in other outdoor gear too. Livecub's cross-country ski length guide is a useful comparison for matching equipment to body size and use.
Use the Wrist Straps Correctly
Put your hand up through the bottom of the strap, then bring it down to hold the grip. The strap should support the heel of the hand so you do not have to squeeze the handle tightly all day.
Adjust the strap so the hand lands naturally on the grip. Too loose, and the strap does nothing. Too tight, and it rubs or traps the wrist. In tricky terrain, some hikers remove hands from straps for quicker release.
A relaxed hand is a sign that the strap is doing its job.
Flat Ground Technique
Use an opposite arm and leg pattern: right pole with left foot, left pole with right foot. Plant the pole slightly behind or beside the opposite foot, then let it push lightly as you walk past it.
Do not stab the ground far ahead. That shortens the stride and can make shoulders work too hard. The pole plant should feel like part of the arm swing you already use while walking.
For people building rhythm and light cardio, Livecub's basic aerobic steps article offers a useful comparison for timing movement without rushing.
Uphill Technique
Shorten the poles a little for long climbs. Plant them slightly ahead and push down and back as the legs drive upward. Keep steps shorter than you would on flat ground.
On steeper climbs, use both poles together for a few steps when extra support helps. Keep the elbows close and avoid pulling with the shoulders. The legs should still do most of the work.
Shorter steps make uphill poles easier to use.
Downhill Technique
Lengthen the poles slightly for long descents. Plant the tips ahead of the feet and let the poles share some impact while you step down. Keep the chest upright and avoid leaning too far back.
Downhill poles are about control, not speed. If the trail is loose, rocky, or wet, slow down and place each tip before committing weight. Rubber tips may slip on some surfaces, while metal tips can be noisy or harsh on pavement.
For another lower-body hill challenge, Livecub's running bleachers benefits article shows how climbs and descents ask for different control.
Sidehill and Uneven Terrain
On a long traverse, shorten the uphill pole and lengthen the downhill pole. This keeps the shoulders more level and prevents the downhill side from feeling like a reach. Make small changes rather than stopping every few steps.
On rocky ground, place pole tips where they will not wedge between stones. If a pole gets stuck, let go instead of wrenching your shoulder. Poles are replaceable. Shoulders are harder to repair.
Using Poles for Fitness Walking
On paved paths or packed trails, poles can add upper-body rhythm to a brisk walk. Keep the tips angled slightly back, push through the straps, and avoid overstriding. The pace should feel smooth and sustainable.
The CDC's adult activity guidance supports regular aerobic activity. Pole walking can be one way to make walking feel more active without turning it into running.
The best pace is the one you can repeat without sore shoulders.
Grip Pressure and Arm Swing
Do not squeeze the grips like handlebars. Let the strap carry some pressure, then close the fingers only enough to guide the pole. A hard grip travels up the forearm and can make the neck tense by the end of the walk.
The arm swing should come from the shoulder naturally, with the elbow slightly bent. If the poles click far ahead of the feet, shorten the stride and plant closer. If the tips drag behind you, push through and lift them sooner.
Quiet hands usually mean better pole timing.
Choosing Tips and Baskets
Use rubber tips on pavement, hard packed paths, and places where metal tips are not welcome. Use metal tips on dirt, gravel, and many natural trails when grip matters. Snow and mud baskets stop poles from sinking too deeply.
Carry the parts you need for the terrain you expect. A paved morning walk and a muddy mountain trail ask different things from the same poles. Check the tips before leaving home so the walk does not start with loose parts.
Common Pole Mistakes
The first mistake is gripping too hard. The second is planting the poles too far forward. The third is leaving the poles the same length for every hill, descent, and traverse.
Another mistake is using poles to force a pace you cannot hold. Poles can make walking feel more efficient, but they do not erase fatigue, heat, poor shoes, or a pack that is too heavy.
Safety and Trail Etiquette
Keep pole tips close to your body when other hikers pass. Do not swing poles out to the side on narrow trails. On boardwalks, rock slabs, or delicate surfaces, use rubber tips if required and follow posted rules.
Check locks before each hike. Collapsing poles can cause a fall. Clean mud from tips and baskets after use, and dry straps before storage so they do not smell or degrade.
When to Put Poles Away
Poles are helpful, but not every moment needs them. Put them away for ladders, tight scrambles, crowded indoor areas, shuttle lines, and places where the tips could trip someone. Foldable poles are useful when the day changes terrain often.
If you need both hands for balance on rock, a pole may be in the way. Secure it to the pack rather than carrying it awkwardly. Good pole use includes knowing when not to use them.
Control matters more than keeping poles in hand all day.
Posture With a Pack
A backpack changes pole timing. Keep the pack snug enough that it does not swing, then use shorter steps and lighter pole plants until the rhythm feels normal. A loose pack can make the shoulders fight the poles all day.
Do not lean your whole body weight into the handles on flat ground. That can overload wrists and make posture collapse. Use steady pressure, stay tall, and let the poles share work rather than take over the walk.
Long Walk Pacing
On long walks, poles can tempt people to start too quickly. Use the first ten minutes as a warm-up. Keep the rhythm easy, then build pace only after breathing, shoulders, and stride feel settled.
Take short breaks before the hands feel irritated. Shake out the fingers, adjust straps if needed, and check that both poles are still locked to the same useful length.
Simple Practice Session
Start with ten minutes on flat ground using the opposite arm and leg pattern. Then find a mild hill and practice shortening the poles for five minutes uphill and lengthening them for five minutes downhill. Finish with easy walking.
If you want a softer indoor movement option on recovery days, Livecub's chair dancing guide is a different low-impact way to keep rhythm without trail load.
Practice before the long hike, not during the hardest mile.
Frequently Asked Questions
How tall should walking poles be?
Start with an elbow angle near 90 degrees on flat ground, then adjust shorter for climbs and longer for descents.
Should I use the wrist straps?
Yes on many easy trails, because straps reduce grip fatigue. Remove hands from straps when a quick release is safer.
Do walking poles help knees downhill?
They can share some impact when placed correctly. They are not a cure for pain, poor shoes, or unsafe speed.
Can I use walking poles on pavement?
Yes, but rubber tips are usually better for grip, noise, and protecting hard surfaces.

Olivia Prete
Edits culture and personal-development articles, distinguishing opinion and experience from verifiable claims.
Leave a reply
Replying to