How to Verify That You Have a CPU Failure
The CPU (or central processing unit) of a computer is difficult to test without expensive and very specialized test equipment that is only found at the manufacturer. There are a number of symptoms that can indicate a faulty CPU as the cause of the problem, but none are absolute.
The only practical way to determine whether a processor is the problem is to replace it with a known working model or a brand new processor of the same type.
Things You’ll Need
- Anti-static wrist strap
- Replacement CPU
- Plastic scraper
- 91 percent Isopropyl alcohol
- Lint-free cloth
- Thermal heat sink compound
9 Steps to Verify That You Have a CPU Failure
1. Power down the computer, disconnect the power cable from the case and remove the case cover.
2. Attach the anti-static wrist strap to one wrist and connect the other end to a metal part of the chassis inside the computer case.
3. Disconnect the power lead that connects the CPU cooling fan to the motherboard.
Release the heat sink and cooling fan retention clip and slide the heat sink to the side slightly to break the bond that has formed with the CPU and the thermal heat sink compound. Remove the fan and heat sink from the system.
4. Scrape the remaining thermal heat sink compound from the CPU using the plastic scraper.
Scrub the residue by applying 91 percent Isopropyl alcohol to a clean, lint-free cloth.
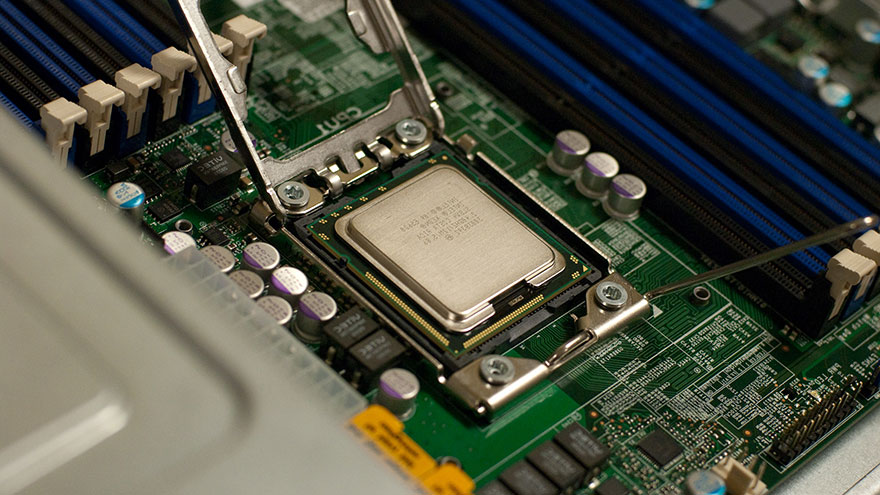
5. Raise the CPU locking mechanism lever to the upright position and grasp the CPU by the edges, lifting it straight out of the socket.
Place it on a small piece of foam or other clean, soft surface.
6. Grasp the replacement CPU by the edges and insert it gently into the socket as indicated by a small triangular marking on the CPU that shows pin 1 on the CPU, which aligns with a similar marking on the socket.
Allow the chip to settle into the socket under its own weight and do not force it into place or wiggle it when it is on the grid, as doing this can bend pins and destroy the CPU. Press down on the CPU once it is seated in the socket to ensure it is at full depth. Lower the locking mechanism lever into place to secure the chip in the socket.
7. Scrape the remaining thermal heat sink compound from the heat sink using the plastic scraper.
Scrub the residue by applying 91 percent Isopropyl alcohol to a clean, lint-free cloth. Allow the alcohol to dry completely (about two minutes) before installing the heat sink.
8. Spread a thin layer of thermal heat sink compound onto the surface of the CPU and place the heat sink and fan squarely onto the CPU.
Attach the retention clip and power lead.
9. Test the system for functionality.
If the same symptoms exist, the CPU is not the source of the problem. If the problems have disappeared, the CPU that was replaced is faulty.
Tips and Warnings
- The power supply can often cause symptoms that point toward other components when it is not able to supply enough power to a system. Modern processors, motherboards and video cards require larger power supplies than past systems.
- The CPU cooling solution needs to be rated to handle the particular processor or the effects of overheating can cause symptoms which appear to be a faulty processor. These symptoms can actually cause damage to the processor if left unchecked.
- Pins on the processor are easily bent and impossible to repair in most cases.
- Processors and other components inside the computer are static sensitive and can be destroyed by handling them without an anti-static protective device.
You Might Also Like :: Microdrive Failure