
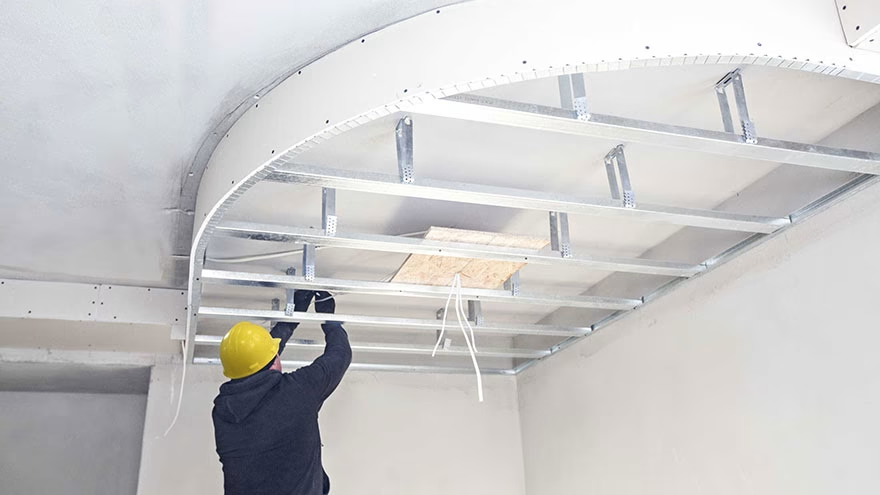
Start With the Failure You Can See
Drywall primer failure usually announces itself after you thought the hard part was done. Paint peels, primer flashes through, joint compound shows dull spots, tape edges swell, or the finish looks blotchy in side light. The wall may feel powdery, slick, damp, or uneven. The fix depends on what failed, so do not start sanding everything until you know what you are seeing.
Primer is not magic paint. It seals porous surfaces, improves adhesion, evens absorption, and gives the finish coat a better base. If the surface is dusty, damp, glossy, contaminated, or still curing, primer can fail no matter how good the can looks. The most useful mindset is surface first, product second.
USG's material guidance for gypsum finishing points painters toward proper surface preparation and suitable primers before decoration. Its Sheetrock First Coat primer page explains that a drywall primer-surfacer is made to help create a better base over new interior gypsum panels and treated joints.
Common Signs of Primer Failure
Drywall primer failure is not one problem. It is a group of symptoms. The same wall can have more than one cause, especially after patching, water damage, or painting over an older finish. Identify the symptom before choosing the repair.
Peeling or lifting
Peeling primer means adhesion failed. The wall may have been dusty, glossy, damp, greasy, or contaminated with wallpaper paste. It can also happen when primer is applied over compound that has not dried fully. If the primer lifts in sheets, the bond below it is weak.
Flashing and dull patches
Flashing is a difference in sheen or texture that appears after paint dries. Joint compound can absorb paint differently than drywall paper, especially if the wall was not sealed evenly. A primer that is too thin, skipped, or poorly matched to the surface can leave patch outlines visible.
Bubbling or blistering
Bubbles often point to moisture, trapped air, old wallcovering adhesive, or poor adhesion. If bubbles appear over a patch, the compound may not have dried or the surface was not cleaned. If they appear near a bathroom, kitchen, window, or ceiling stain, find the moisture source before repainting.
Dust Is the Quiet Cause
Freshly sanded joint compound leaves fine dust that clings to drywall paper, corners, and trim edges. Primer applied over dust bonds to the dust, not the wall. The finish may look acceptable for a while, then peel or scratch off too easily. This is one of the easiest failures to prevent and one of the most annoying to fix.
After sanding, vacuum with a brush attachment or use a clean microfiber cloth. Do not soak raw drywall with water. A barely damp cloth can help in some areas, but heavy water can raise paper fibers and create a new problem. Corners, outlets, and baseboard edges need extra attention because dust collects there.
Dust problems are similar to other finish failures around the house. Livecub's article on wood edgeband failure shows how a small prep issue at the bond line can turn into a visible defect later. Drywall primer works the same way: the hidden layer decides how the visible layer behaves.
Moisture and Cure Time Matter
Joint compound needs time to dry before primer. Thick patches, humid rooms, cold walls, and poor airflow all slow drying. A patch that feels dry on the surface can still hold moisture underneath. If primer traps that moisture, bubbling, soft spots, or peeling can follow.
Water stains need more than standard primer. Find and fix the leak first. Then choose a stain-blocking primer made for the stain type and surface. If the stain keeps bleeding through, the wall is telling you the source was not handled or the wrong primer was used.
Moisture can also come from bathrooms, kitchens, basements, and exterior walls. Use ventilation and give repairs enough time. If the drywall feels soft, crumbly, or swollen, primer is no longer the main issue. Damaged board may need replacement.
Before repainting, mark the failed area with painter's tape and watch it for a day if moisture is suspected. A patch that darkens, softens, or smells damp after cleaning should not be sealed yet. Use a fan, improve airflow, and confirm the source is gone. Primer can hide a stain for a while, but it cannot dry a wall from the inside. This pause saves repainting.
Wrong Primer, Wrong Surface
New drywall, repaired drywall, glossy painted walls, stained areas, and wallpaper residue do not all need the same primer. A general-purpose primer may be fine for a clean repaint, but it may not seal joint compound well enough or grip a slick surface. A stain-blocking primer may solve bleed-through but feel like too much for a plain new wall.
Sherwin-Williams' guidance on prepping walls for painting emphasizes cleaning, repairing, sanding, and priming based on the condition of the wall. That sequence matters. Primer cannot compensate for grease, soap film, loose paint, or shiny enamel that was never scuffed.
If you are working over plaster or old wall treatments, the prep changes again. Livecub's guide to wallpapering over plaster walls is a useful reminder that older walls need patient evaluation before a new finish goes on. Drywall is simpler, but not immune to old adhesive, chalky paint, or hidden moisture.
How to Fix a Failed Primer Job
Start by removing loose material. Scrape gently with a putty knife and stop where the coating is firmly bonded. Feather the edges with sanding, then remove dust. If the wall is glossy, scuff sand. If there is grease or residue, clean it with a suitable cleaner and let it dry fully.
For small areas, spot prime with the right primer and let it dry. Then inspect under side light. If the repair is smooth, repaint the section or wall. For large failures, stripping loose primer and re-priming the whole wall may be cleaner than chasing patches. Do not rush between coats; dry time is part of the repair, not an optional delay.
If the same defect returns, stop and test a small area before coating the whole room. Clean one section, sand another, and use the correct primer on both. After it dries, check adhesion with gentle scraping in a low-visibility spot. A small test patch can reveal dust, moisture, old adhesive, or product mismatch before you spend another afternoon repeating the failure.
Pre-1978 homes need lead-safe care before sanding or scraping old coatings. The EPA's Renovation, Repair and Painting Program explains certification and work-practice rules for projects that disturb lead-based paint in older housing and child-occupied facilities. If lead is possible, use certified help or follow the proper rules before disturbing paint.
Preventing the Next Failure
Prevention is mostly patience. Let compound dry. Sand smoothly. Remove dust. Check for moisture.
Pick the primer for the surface. Apply the recommended thickness. Let primer dry before painting. Those steps sound basic, but primer failure usually comes from skipping one of them.
Use light to your advantage. Shine a work light across the wall before priming and again after primer dries. Side light shows ridges, scratches, bubbles, and uneven patches better than overhead light. Fixing them before paint is easier than explaining them after the room is finished.
Other home failures follow the same pattern of material, prep, and conditions. Livecub's article on porcelain insulator failure is a different field, but the thinking is familiar: identify stress, moisture, surface condition, and the right professional boundary. With drywall, that boundary is usually between normal painting repair and damage that needs board replacement or lead-safe work.
Frequently Asked Questions
Why did my primer peel off new drywall?
The most common causes are sanding dust, damp compound, damaged drywall paper, thin primer, or the wrong primer. Remove loose material, clean the surface, dry it fully, and re-prime.
Can I paint over failed primer?
No, not if it is peeling, bubbling, or powdery. Paint will only cover the symptom for a while. Remove loose coating, fix the cause, and prime again.
Why do drywall patches show through paint?
Patches can flash because joint compound absorbs paint differently than surrounding drywall or old paint. Sand smooth, remove dust, and use a primer that seals the patch evenly.
Do I need a special primer for stains?
Often, yes. Water stains, smoke, ink, and tannin bleed may need a stain-blocking primer. Fix the source of moisture or staining before priming.

Tory Stearns
Edits practical household, travel and lifestyle explainers. Claims that can change are linked to current primary or subject-authority sources.

Leave a reply
Replying to