
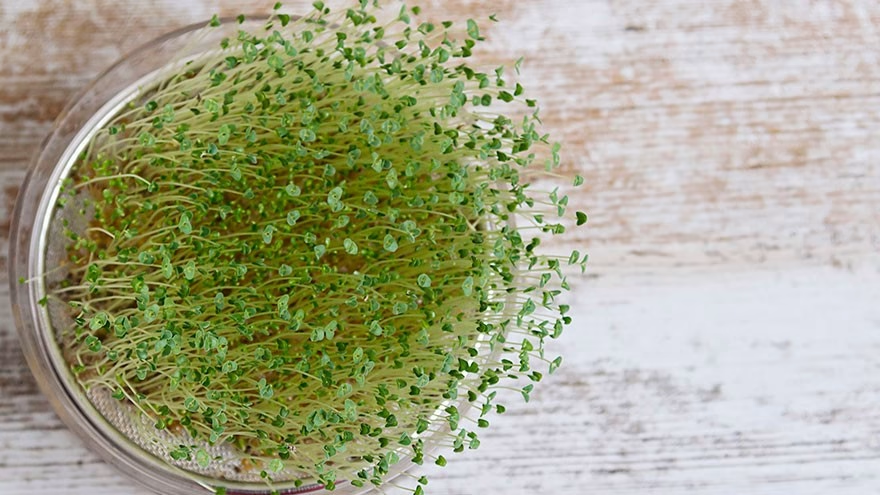
Growing Sprouts at Home Is Easy, but Food Safety Comes First
How to Grow Sprouts sounds like a simple kitchen project: soak seeds, rinse them, and wait for tiny shoots. The process is simple, but sprouts deserve more caution than many home projects because they grow in warm, moist conditions that can also support bacteria.
That does not mean you should panic. It means you should buy the right seed, keep equipment clean, drain well, refrigerate quickly, and understand when cooking is safer than eating raw.
Sprouts are fresh food, not a no-risk countertop decoration.
Choose Seed Sold for Sprouting
Start with seeds or beans labeled for sprouting. Garden seed may be treated for planting, not eating, and pantry beans may not be handled with sprouting in mind.
FDA's produce safety guidance includes sprouts among foods that need careful selection and handling. Buy from a source you trust and avoid seed that smells musty or looks damaged.
Common sprouting choices include alfalfa, mung beans, lentils, broccoli seed, radish seed, and clover. Each has a different flavor and sprouting time.
Good sprouts begin before the first soak.
Clean the Jar and Tools
Use a clean wide-mouth jar, sprouting lid, mesh, or fine strainer. Wash everything with hot soapy water before starting.
Hands matter too. Wash hands before touching seeds, jars, lids, or finished sprouts. Keep the sprouting setup away from raw meat, dirty sponges, pet bowls, and splash zones near the sink.
Livecub's cookie display guide is a very different kitchen topic, but the same practical idea applies: clean containers make food handling easier to trust.
Clean tools do not guarantee safety, but dirty tools raise risk.
Soak, Rinse, and Drain Well
Most sprouts begin with soaking. After soaking, drain the water and rinse the seeds with clean water.
Drain thoroughly after each rinse. Standing water encourages spoilage and bad smells. Tilt the jar so water can escape and air can move.
The daily rhythm is simple: rinse, drain, repeat. Do not let the jar sit in a puddle.
Keep the Batch Small
Large batches are harder to rinse, drain, cool, and use quickly. Start with one or two tablespoons of seed until you know how much your household eats.
Sprouts expand more than beginners expect. A small spoonful of seed can fill a jar after a few days.
Small batches are easier to keep fresh and honest.
Watch Smell and Texture
Fresh sprouts should smell clean and mild. Sour, rotten, slimy, or musty sprouts should be discarded.
Do not try to rescue a questionable batch by rinsing harder. If the smell or texture is wrong, throw it out, wash the jar, and start again.
For other vegetable handling ideas, Livecub's guide to cooking greens is a useful companion because greens and sprouts both reward freshness and careful washing.
Know Who Should Avoid Raw Sprouts
CDC's sprouts food safety page notes that raw or lightly cooked sprouts can be a source of food poisoning and advises people at higher risk to cook sprouts thoroughly.
Higher-risk groups include young children, older adults, pregnant people, and people with weakened immune systems. For those eaters, cooked sprouts are the safer choice.
Crunch is not worth ignoring a real food safety risk.
Refrigerate Finished Sprouts Promptly
Once sprouts are ready, drain them well and refrigerate them in a clean container. Use them quickly and keep them cold.
FoodSafety.gov's cold food storage charts are a useful reminder that refrigeration slows risk but does not make food last forever.
If sprouts sit out for a long time, smell wrong, or look slimy, discard them.
Use Sprouts in Cooked Dishes Too
Raw sprouts are common on sandwiches and salads, but cooked sprouts can add texture to soups, noodle bowls, omelets, and stir-fries.
Livecub's stir fry sauces article is a natural place to take sprouts once you want a hot dish instead of a cold topping.
Cooking changes the texture, but it can make sprouts safer for people who should avoid them raw.
Sprouts Are Not the Same as Microgreens
Sprouts are usually eaten seed, root, and shoot together after growing in water. Microgreens are often grown in a medium and cut above the root.
Both can be delicious, but their growing methods and food safety practices differ. Do not assume advice for one always applies to the other.
Set a Rinse Schedule You Can Actually Keep
Many sprouting failures come from forgetting the rinse schedule. Pick times that fit your day, such as breakfast and dinner.
If you know you will be away for a long stretch, do not start a batch the night before. Sprouts are living food, and neglect shows quickly.
A sprouting routine should match your real kitchen habits.
Use the Right Jar Size
Seeds need room to expand. A jar that looks empty on day one can become crowded on day three.
If sprouts are packed tightly, they may drain poorly and spoil faster. Use a larger jar or start with fewer seeds until you learn the yield.
Keep Sprouts Away From Strong Kitchen Odors
Sprouts can pick up unpleasant smells if stored near uncovered onions, strong leftovers, or dirty containers. Keep finished sprouts in a clean, closed container in the refrigerator.
Label the date if you make sprouts often. That small habit prevents mystery containers from living too long in the fridge.
Fresh sprouts should taste clean, not like the back of the refrigerator.
Do Not Treat Sprouts as Medicine
Sprouts can be part of a varied diet, but they should not be sold to yourself as a cure for disease. The older source text made strong health claims that need more caution.
Enjoy sprouts for crunch, flavor, and variety. For health concerns, rely on qualified medical advice instead of one kitchen ingredient.
Try Easy First Batches
Mung beans and lentils are often forgiving starter choices. Alfalfa and broccoli sprouts can be popular, but any sprout still needs safe handling.
Start with one variety at a time. Mixing seeds can make timing harder because each type may sprout at a different speed.
Clean Up After Each Batch
When the jar is empty, wash it well before starting again. Check mesh lids and jar rims where bits can stick.
If a batch spoiled, clean more carefully and consider replacing old mesh or worn lids. Starting fresh is cheaper than eating questionable food.
The next batch is only as clean as the setup you reuse.
Choose Where the Jar Sits
Keep the sprouting jar at ordinary room temperature, away from direct sun, stove heat, and dirty sink splash. A shaded counter is usually better than a hot windowsill.
If your kitchen is very warm, sprouts may develop faster and spoil faster. Check them more often and move finished sprouts to the refrigerator as soon as they are ready.
Rinse Before Serving
Give finished sprouts a final rinse and drain before eating or cooking. Use clean water and handle them with clean utensils.
Do not mix fresh sprouts into a bowl that held raw meat, unwashed produce, or old leftovers. Cross-contact can undo careful sprouting.
Food safety is a chain of small habits.
Use Cooked Sprouts for Meal Prep
If you are making meals ahead, cooked sprouts are often easier to manage than raw ones. Add them to soup, fried rice, noodles, or a hot vegetable bowl.
For cold lunches, keep sprouts chilled and pack them separately if you want crunch. Add them just before eating.
Know When to Stop a Batch Early
You do not have to wait for long tails. Some sprouts taste best when short and crisp.
If the sprouts look ready, smell clean, and have the texture you like, refrigerate them. Waiting another day can make them stringy or more fragile.
Harvest timing is part of quality control.
When in doubt, harvest smaller and start a fresh batch sooner.
Frequently Asked Questions
How long do sprouts take to grow?
Many sprouts take two to five days, depending on the seed, temperature, and desired length.
Can I eat homegrown sprouts raw?
Some people do, but raw sprouts carry food safety risk. Higher-risk groups should cook sprouts thoroughly.
Why do my sprouts smell bad?
Poor drainage, old seed, dirty equipment, or spoilage can cause bad smells. Discard sour, slimy, or musty batches.
Do sprouts need sunlight?
Most jar sprouts do not need strong sunlight. They need clean water, air circulation, proper drainage, and refrigeration after harvest.

Chiara Bradshaw
Covers education, culture and creative topics with an emphasis on readable explanations and verifiable references.




Leave a reply
Replying to