
The moment a belly bowl cast lifts away from the skin — warm from the setting plaster, holding every curve perfectly — is something between sculpture and memory. That gentle warmth is not accidental; it is calcium sulfate hemihydrate reacting with water to form gypsum, releasing heat as the crystal structure locks into place. You are, in a very real sense, watching chemistry preserve a shape that will never exist again in quite the same way. A belly bowl cast is one of the most personal keepsakes a pregnant person can make, and the good news is that it requires no artistic training — just a helper, an afternoon, and the right materials.
What is a belly bowl cast and why make one?
A belly cast — sometimes called a belly mask or prenatal cast — is a three-dimensional plaster sculpture of a pregnant abdomen. The bowl variation refers to a cast taken only of the lower belly (rather than a full torso bust), which, once cured and trimmed, can sit open-side-up as an actual decorative bowl. Belly casting has roots in the broader tradition of life casting, a sculptural practice that dates back centuries, but it gained real momentum in pregnancy communities through the 1980s and 1990s as a form of birth art — a way of honoring the body's transformation rather than hiding it.
People make belly bowl casts for all kinds of reasons: to document the growth across trimesters with a series of casts, to create nursery art, or simply because a photograph cannot capture the three-dimensional weight and roundness of a full-term belly. Once painted or decorated, the finished bowl can hold jewelry on a dresser, act as a centerpiece in the nursery, or hang on a wall. Some families take the raw cast to a local ceramicist who can fire a companion ceramic bowl in its exact shape — a one-of-a-kind commission that doubles as functional art. Related reading: How to Feel Attractive During Pregnancy and How to Stay Intimate During Pregnancy.
When is the best time during pregnancy to make a belly cast?
Most casting guides and midwives point to 36 to 38 weeks as the sweet spot. By this point the belly has reached its fullest, most dramatic curve — the navel is pushed forward, the skin is taut, and the overall shape is unmistakably pregnant. After 39 or 40 weeks, positioning becomes harder: lying back can feel uncomfortable due to the weight pressing on the vena cava, and some babies have already dropped, changing the belly's silhouette. Earlier than 34 weeks and the belly, while clearly pregnant, lacks the peak roundness most people want to capture.
If you want to document the journey rather than just the finale, you can make a series of smaller casts starting around 20 weeks. Each one will show a measurably different shape, and the set displayed together tells the story of growth in a way no ultrasound printout can. Whatever week you choose, keep the session to around 30 minutes — that is enough time to apply the plaster gauze, let it set, and remove the cast without fatigue. Have water and a snack ready for afterward.
What materials do you need for a belly bowl cast?
Commercial kits from brands such as Luna Bean (Proud Body) simplify sourcing: the basic kit includes four rolls of plaster gauze (about 20 square feet of casting material), an all-natural lubricant, gloves, a drop cloth, and instructions. If you prefer to assemble your own kit, here is everything you need:
- Plaster casting gauze — 4 rolls (4-inch width), standard-set variety. Fast-set strips harden in under 5 minutes, which is too quick for a belly; standard-set gives you a comfortable 8–10 minute working window per section.
- Petroleum jelly (or coconut oil) — for the skin barrier. A generous layer is non-negotiable: the exothermic reaction that hardens plaster can push skin temperature toward uncomfortable levels, and any body hair will bond painfully to uncoated gauze.
- Large bowl of warm water — 80–90°F is ideal. Cold water slows the setting reaction; very hot water accelerates it, leaving you little time to smooth strips.
- Scissors — for pre-cutting strips to 12–18 inch lengths before you begin.
- Rubber or nitrile gloves — plaster is alkaline and drying on skin after repeated dunking.
- Drop cloth or plastic sheeting — plaster drips everywhere.
- Comfortable chair — sitting or standing with knees softly bent are both valid positions; lying down is not ideal because it flattens the belly.
- Plastic wrap — to protect underwear or a bra from petroleum jelly and plaster.
- Newspaper — crumpled and stuffed inside the cast during curing to maintain the dome shape.
- Fine-grit sandpaper — 120-grit for initial smoothing after curing, 220-grit for the final pass before decoration.
- Gesso — two coats seals the porous plaster surface so paint does not sink in or flake off.
Optional additions for a more complete cast: a third plaster roll if you want to include the breasts, plus two extra squares of gauze cut for the nipple areas.
Step-by-step: How to make a belly bowl cast
Read through all the steps before you begin so there are no surprises once your hands are wet and time is moving. Have your helper close and your materials organized within arm's reach.
1. Cut your strips in advance. Open two rolls of casting gauze and cut them into strips 12 to 18 inches long. Also cut one small square, roughly 4 by 4 inches — this goes over the navel first to capture its exact shape. Pre-cutting saves frantic scissor work mid-session. Reserve the extra rolls in case you need reinforcement on the sides.
2. Set the scene. Lay the drop cloth. Have the pregnant person remove clothing from the torso and sit comfortably in the chair. Secure plastic wrap around underwear and bra edges to keep them clean. Check that they are warm enough — the room should be around 70°F or above, because the belly will be exposed for 30 minutes and wet plaster initially draws warmth before the exothermic reaction kicks in.
3. Apply the skin barrier. Apply petroleum jelly generously across the entire belly — from below the breasts down to the bikini line and around the sides — using strokes that follow the direction of hair growth. Any hair that escapes the barrier will bond to the gauze. Be especially thorough near the navel, where fine skin folds can catch plaster.
4. Start at the navel. Fill the bowl with warm water. Put on your gloves. Wet the 4-by-4-inch square piece, let the bubbles stop, then gently smooth it between your palms to remove excess water without squeezing out the plaster. Press it firmly onto the navel so it conforms to the exact indent or protrusion. Do not layer more strips directly over this piece — the navel shape is set here and adding more plaster on top obscures the detail.
5. Build the cast layer by layer. Dip one strip at a time, wait two seconds for bubbles to stop, then run it lightly between two fingers to prevent drips. Apply strips horizontally across the belly in overlapping rows, each one covering about half of the strip below it. After the first full layer, apply a second layer with strips running diagonally. Three layers total is usually enough for a stable cast; four layers along the sides (which bear more stress when the cast is lifted) adds durability without excessive weight or heat buildup.
6. Smooth and reinforce the edges. The sides of the belly — where the cast will curve under toward the back — are the most likely point of future cracking. Apply two extra strips folded lengthwise along each side edge, pressing firmly. A well-reinforced edge is what separates a display piece from a cast that cracks in half the first time someone picks it up.
7. Wait for the warmth to pass. The plaster will warm noticeably as it sets — this is the exothermic gypsum reaction doing its work. It should feel pleasantly warm rather than hot. If it ever feels burning, slide your fingers under an edge immediately. After 20 to 30 minutes, the cast will begin to pull slightly away from the skin on its own. That is your cue. Have the pregnant person lean forward gently, hold the sides of the cast, and let it ease off. It should release with a satisfying pop.
8. Shower and rest. Help them into a warm shower to rinse the petroleum jelly from the skin. The casting session is physically demanding at the end of pregnancy, so encourage them to rest and eat something.
9. Cure the cast properly. Stuff the inside with crumpled newspaper to support the dome shape, then set the cast belly-side-up in a well-ventilated area. Let it cure for a minimum of 48 hours — the outside may feel dry after 24 hours but the interior is still damp. Rushing this step is one of the most common causes of cracking. Once fully cured, sand first with 120-grit paper to remove rough gauze texture, then finish with 220-grit for a smooth, paint-ready surface.
For a wider community perspective on body-positive pregnancy experiences, How to Deal With Depression During Pregnancy is worth reading alongside your casting preparation.
How to decorate and finish your belly bowl cast
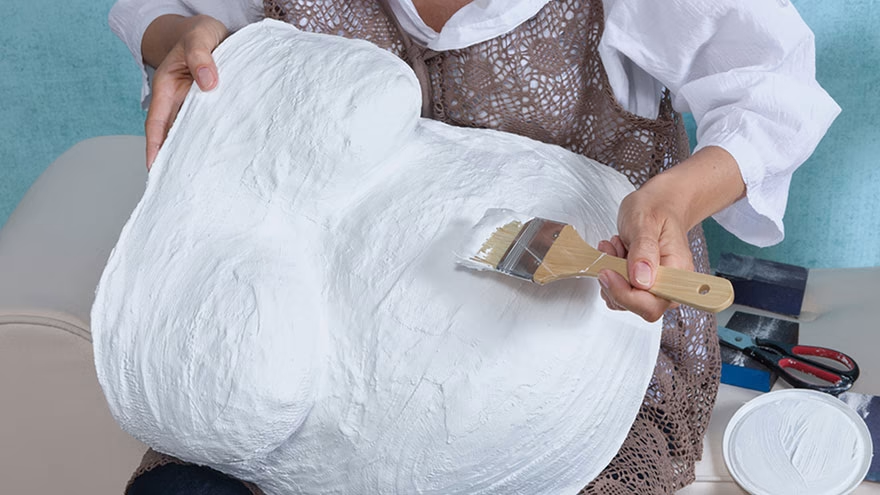
Once sanded, the cast needs a primer before any paint will hold reliably. Gesso — the same material artists use to prime canvas — is the right choice here. Apply two thin coats with a soft brush, letting each coat dry for an hour, and sand lightly between coats with 220-grit paper. The result is a bright white, slightly chalky surface that accepts acrylic paint beautifully.
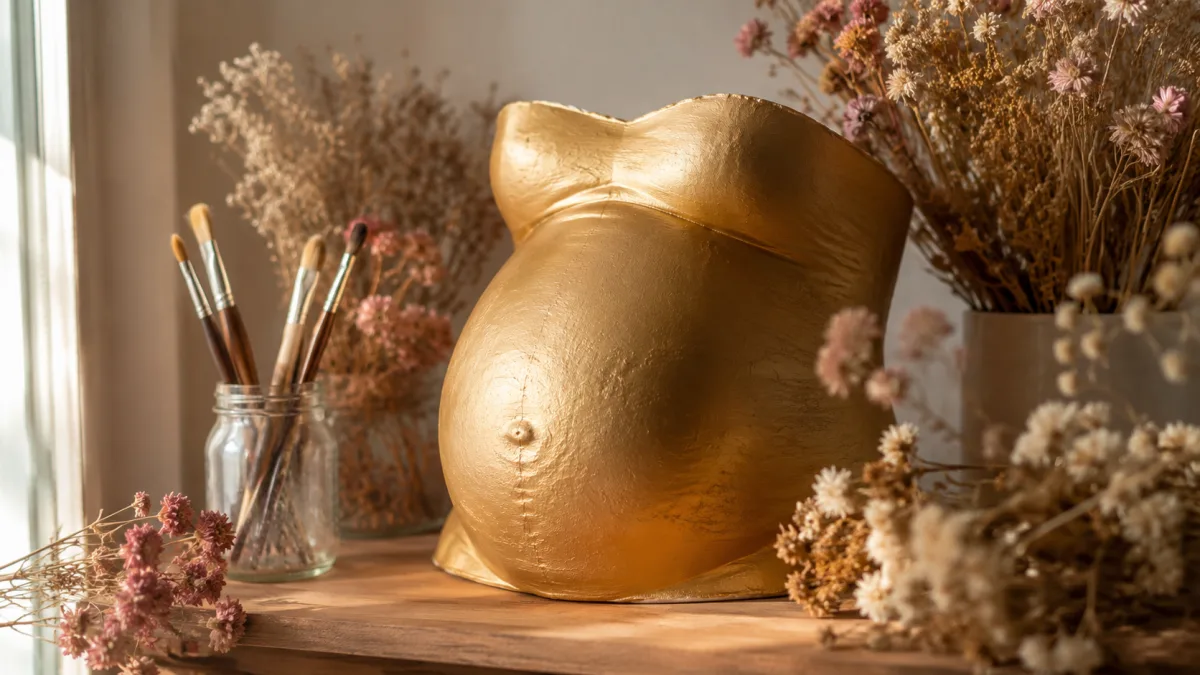
From there, decoration is limited only by patience and preference. Some of the most striking finished casts keep it simple: a single coat of metallic gold or bronze paint, with a dry-brushed highlight across the highest curves. Others use the belly's natural contours as an armature for painted botanical illustrations — trailing leaves and flowers that wrap around the dome. Mosaic work using small mirror tiles or broken ceramic shards pressed into a thin layer of tile adhesive creates something genuinely spectacular, though it requires several evenings of work. Decoupage with tissue paper in layered translucent colors gives a warm, watercolor-like finish that is surprisingly forgiving for beginners.
If you want to include a partner's handprint, press it into a thin slab of air-dry clay set inside the bowl after curing, let it dry, and glue it in place. You can also add the baby's handprints or footprints taken in the first days after birth, making the cast a before-and-after record of the transition to parenthood. Seal the finished piece with two coats of matte or gloss acrylic varnish to protect it from humidity and dust.
Converting your belly cast into a bowl
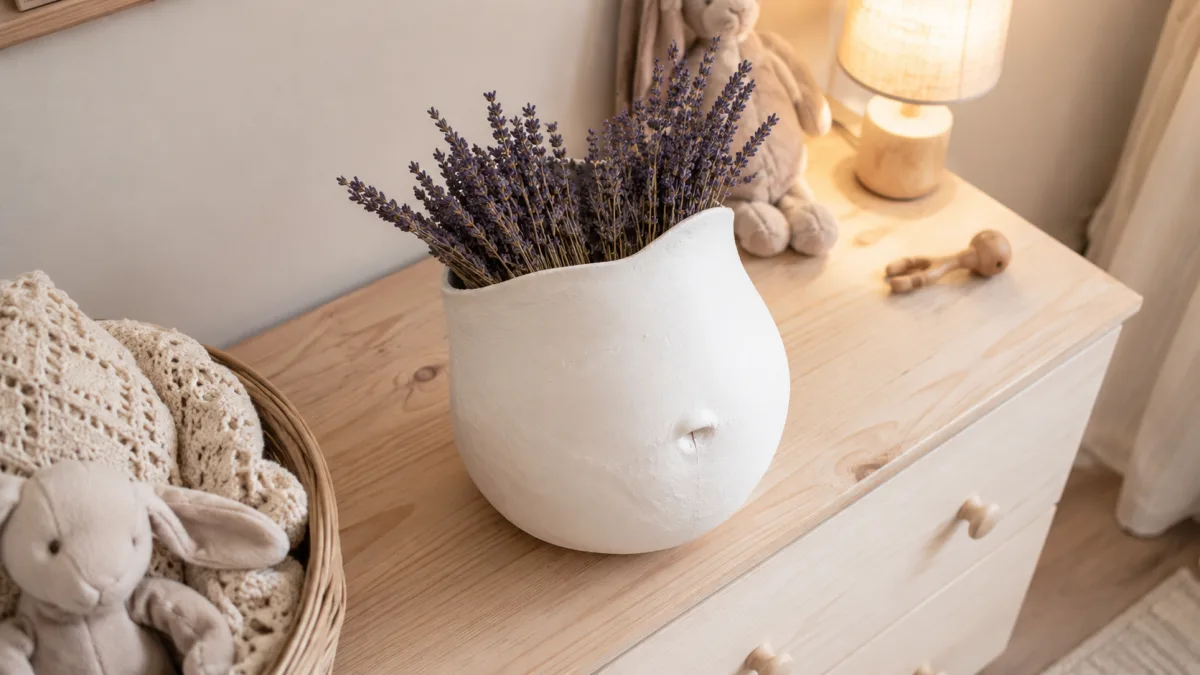
A belly-only cast (as opposed to a full torso bust) naturally forms a bowl shape when flipped open-side-up. The challenge is the base: an unmodified cast rocks and tips because the underside is curved. There are three clean solutions.
The simplest is a ring of craft felt or silicone furniture pads cut in a circle and glued to the lowest point of the exterior, creating a stable flat contact point. For a more polished look, attach a small wooden disc — cut from a 4-inch wooden circle blank available at any craft store — to the outside base with strong epoxy, sanding both surfaces first so the adhesive grips. The most involved option, and the most beautiful, is to take the cast to a local potter: they can use it as a reference to throw a matching ceramic bowl with a proper footed base, fired and glazed to complement the plaster original.
Before committing to the bowl format, trim any uneven lower edges with a craft saw or oscillating tool. Work slowly and wear a dust mask — dry plaster dust is fine and best not inhaled. After trimming, sand the cut edge smooth and apply a final coat of gesso to seal any newly exposed plaster. The finished bowl can hold rings and earrings on a bathroom shelf, dried flowers on a mantelpiece, or small keepsakes in the nursery.
Common mistakes to avoid when making a belly cast
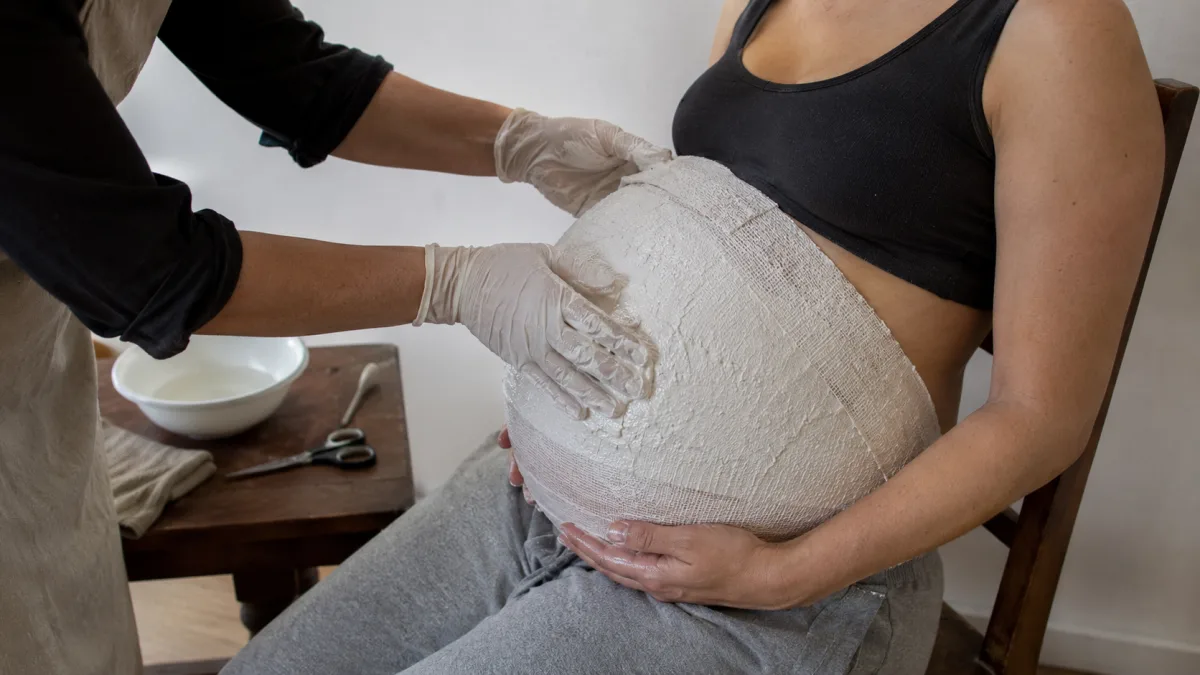
The most damaging mistake — in terms of wasted time and materials — is not applying enough petroleum jelly. A thin, patchy coat feels sufficient but will not fully coat fine body hair or skin folds near the navel, and removal becomes painful rather than satisfying. Apply a layer thick enough to see a sheen across the entire casting area.
Using water that is too hot is the second major pitfall. Water above 100°F dramatically shortens the working time of standard-set plaster gauze, meaning strips begin to stiffen before you have smoothed them. The cast ends up lumpy, with visible seams and ridges. Aim for comfortably warm — the temperature of a relaxing bath, not a hot spring.
Applying too many layers in a single session sounds like it would make the cast stronger; in practice it generates more heat (more plaster reacting simultaneously) and adds weight that can distort the shape before it fully sets. Three overlapping layers is the reliable standard. If you want extra thickness later, you can apply a fresh coat of plaster of Paris with a brush to the interior of the fully cured cast.
Removing the cast too early is another common error, particularly when the surface feels firm. Press gently on the thickest area — if it gives slightly or still feels warm, wait another 10 minutes. A cast removed before it is ready can flex, crack, or distort in ways that cannot be fixed.
Finally, curing the cast belly-side-down flattens the dome. Always cure it dome-up, supported by crumpled newspaper, in a room with moving air. High-humidity environments (like a bathroom) will slow curing significantly; a kitchen counter with a window cracked is a better choice.
This article is for general informational purposes only and does not constitute medical advice. Consult your healthcare provider or midwife before making a belly cast, particularly if you have any skin conditions, allergies, or pregnancy complications.
Frequently Asked Questions
Can I make a belly bowl cast on my own, or do I need a helper?
A helper is strongly recommended. You cannot easily reach the sides of your own belly to apply and smooth strips while keeping the cast symmetrical. More importantly, a helper can monitor the time and check for any discomfort — particularly the heat of the setting plaster — that you might miss when focusing on staying still. Choose someone patient and calm; they do not need any craft experience.
How long does the plaster gauze take to set and when can I remove the cast?
Standard-set plaster gauze begins to stiffen within 5 to 8 minutes of application. The full cast is typically firm enough to remove after 20 to 30 minutes, once the warming sensation has peaked and subsided. Do not mistake the initial surface hardness for complete set — the interior layers are still actively curing. After removal, the cast needs 48 hours of open-air curing before sanding or decorating.
Is petroleum jelly safe to use on a pregnant belly?
Pharmaceutical-grade petroleum jelly (such as Vaseline) is widely regarded as safe for skin contact. It sits on the skin surface as an occlusive barrier rather than absorbing through it, and it has a long track record in both cosmetic and medical applications. Coconut oil and pure shea butter are popular natural alternatives, though they provide a slightly less complete barrier against fine body hair. If you have sensitive skin or any known allergies, test a small amount on your forearm the day before your casting session and consult your midwife or doctor. See also: Bland Diets for Pregnancy for more general pregnancy comfort guidance.
What week of pregnancy should I make my belly cast?
Weeks 36 to 38 hit the practical sweet spot: the belly has reached its fullest curve, the navel is fully pushed forward, and the baby has not yet dropped significantly (which reshapes the lower abdomen). After 39 weeks, prolonged sitting or standing becomes more taxing, and positioning is harder. If you want a series of casts to document growth, start around 20 weeks and repeat every four to six weeks.
My cast cracked after drying — can it be repaired?
Yes. Mix a small amount of plaster of Paris to a creamy consistency, dampen the cracked edges slightly with water, and fill the crack with a thin tool or palette knife. Smooth the surface and allow it to dry fully before sanding. For structural cracks that go most of the way through the wall, reinforce the interior with a strip of cotton muslin soaked in plaster, pressed across the repair and allowed to harden. This adds tensile strength and prevents the crack from reopening.
Can I include my breasts in the cast?
Yes — many people do, particularly those who want a full torso bust rather than just a belly bowl. You will need a third roll of casting gauze and two extra squares cut for the nipple areas. Apply petroleum jelly very generously across the chest, including under the breasts where skin folds are most likely to catch. The technique is the same as the belly: start with the nipple squares to preserve the shape, then build outward in overlapping rows. The finished piece will require a stand or wall mount rather than functioning as a bowl.
Sources and verification
Check current details with these primary or subject-authority sources before acting on the information.

Linda Fehrman
Edits general wellness and relationship explainers. Health material is educational, avoids diagnosis and links to health-authority guidance.

Leave a reply
Replying to