

Fudge icing is not a frosting that sits still and behaves. Pour it too late and it seizes in the pan; spread it too slowly and it locks up mid-stroke. This mom's best fudge icing recipe belongs to an older tradition of cooked chocolate icings—a technique rooted in candy-making science, not pastry arts—and understanding why it works makes the difference between a glossy, fudgy layer and a grainy brick. The recipe is simple: 1 stick butter, cocoa, powdered sugar, milk, and vanilla. Getting it right takes about 15 minutes and one confident pour.
What Makes This Icing Fudge (Not Ganache, Not Buttercream)
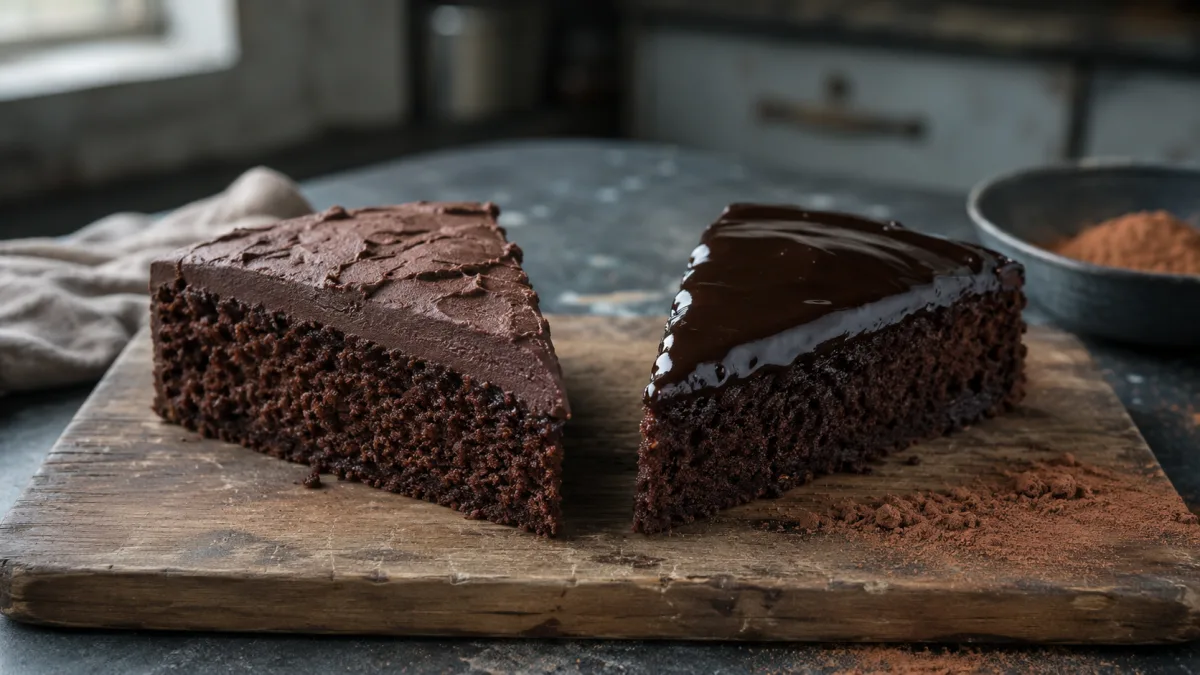
Ganache is an emulsion of chocolate and heavy cream. Buttercream is fat and sugar whipped to trap air. Fudge icing is neither. It relies on the same principle as making candy fudge: a supersaturated sugar solution that, when agitated at the right moment, forms thousands of tiny crystals all at once. Those microcrystals—too small to feel on the tongue—create the dense, matte, slightly firm texture that distinguishes a cooked chocolate icing from anything you'd scoop from a tub.
The butter here is not for structure the way it is in buttercream. It acts as an interfering agent, coating developing sugar crystals and limiting their growth. Without fat in the mix, the sugar would crystallize into coarse, gritty chunks. The butter keeps crystallization controlled and even. That is why this icing sets firm but still melts cleanly on the tongue: the crystals are present, just very small.
Ganache, by comparison, does not crystallize at all—it sets through the solidification of cocoa butter at room temperature. Buttercream relies on air bubbles staying intact. Fudge icing is a different beast entirely, and it rewards anyone who treats it with the same respect you'd give a pot of candy on the stove.
Ingredients Breakdown
This recipe keeps the list short, but each item carries specific weight.
- 1 stick (113g) butter: Provides fat to interrupt crystallization and deliver richness. Unsalted gives you more control over the final flavor.
- 1/2 cup cocoa: The base chocolate flavor. Either natural or Dutch-process works here since there are no leavening agents in this icing. Dutch-process gives a deeper, smoother taste; natural cocoa reads slightly brighter and more bitter.
- 1/2 cup cocoa powder (second addition): Added off-heat after the boil, this uncooked cocoa intensifies the chocolate without further cooking—the same layering technique seen in double-chocolate brownie recipes.
- 1/2 cup milk: Provides the liquid needed to dissolve the sugar and create a pourable consistency. Whole milk produces a richer result; 2% works but the icing may set slightly softer.
- 1 tsp. vanilla: Added off-heat to prevent the alcohol from cooking off entirely. Vanilla rounds the bitterness of cocoa without sweetening further.
- 1 cup powdered sugar: Pre-sifted confectioners’ sugar dissolves faster and produces a smoother icing than granulated sugar would at this scale.
The ratio of cocoa to sugar here leans toward the dark end. If you prefer a milder icing, reduce the total cocoa by 2 tablespoons; if you want it closer to bittersweet, swap natural for Dutch-process on the first addition.
Step-by-Step Instructions
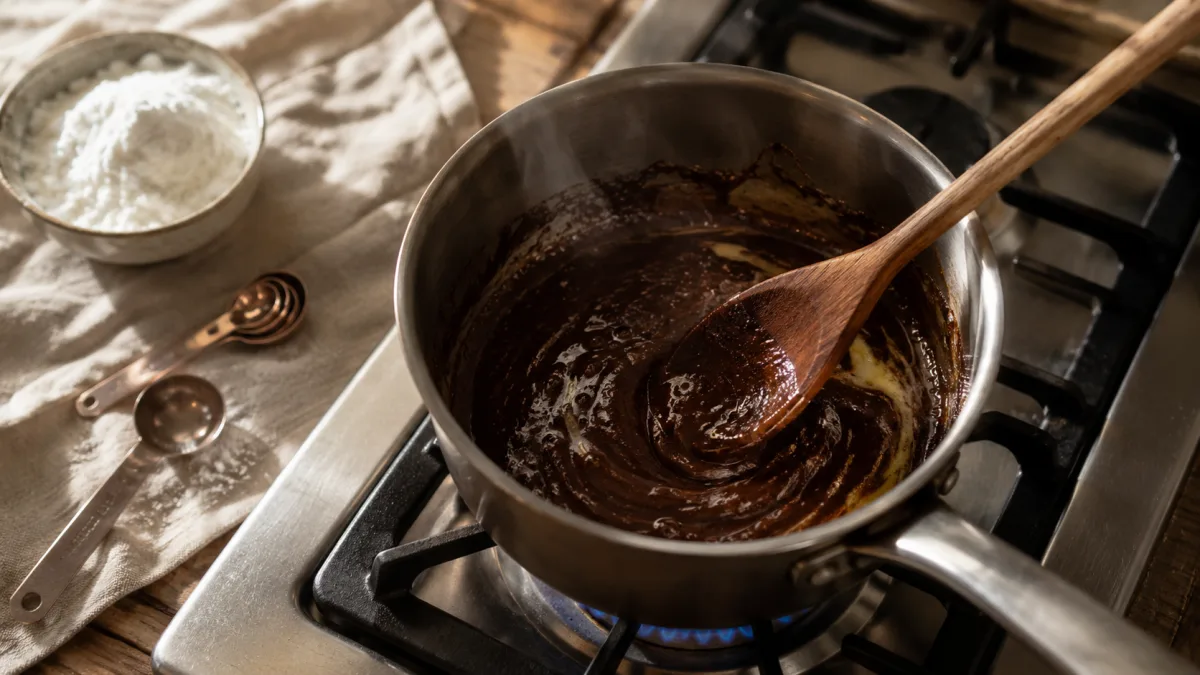
Have your cake ready before you start. This icing does not wait. Once you pour, you have roughly 60-90 seconds of workable time before it starts to set.
- Melt the butter in a medium saucepan over medium heat. Do not let it brown—this is not a brown butter application, and the milk solids browning will add bitterness you don't want here.
- Add 1/2 cup cocoa to the melted butter and stir to combine into a thick paste. This step blooms the cocoa in fat, extracting fat-soluble flavor compounds and deepening the chocolate character before any liquid is added.
- Heat the milk separately until hot but not boiling—around 170°F (77°C). Scalded milk dissolves the powdered sugar faster and prevents a starchy, unincorporated texture in the finished icing.
- Add the cocoa-butter mixture to the powdered sugar in your mixing bowl. Stir briefly to coat the sugar.
- Pour in the hot milk gradually, stirring to reach your desired spreading consistency. Add less for a thicker icing that sets in defined ridges; add more for a glaze-like pour that levels itself flat.
- Remove from heat. Immediately stir in the vanilla extract and the second 1/2 cup of cocoa powder. Beat vigorously—by hand or with a hand mixer on medium speed—until the icing is smooth and just begins to lose its high gloss. That shift from glossy to semi-matte signals that crystallization has started.
- Pour immediately onto your cake, cupcakes, or brownies. Spread quickly with an offset spatula if needed. Do not go back over sections that have already started to set, or you will pull and streak the surface.
- Allow to cool completely at room temperature for at least 30 minutes before slicing.
If you want to use this as a poured glaze for a sheet cake, set the baked cake on a wire rack over a rimmed sheet pan before pouring, so the excess icing drips off cleanly rather than pooling.
Troubleshooting: Too Thick, Too Thin, or Grainy
Even an experienced baker runs into problems with cooked icings. Three failure modes show up most often.
Too thick before you pour: This happens when the icing cools too long on the counter after you remove it from heat. The fix for next time is to pour within 60 seconds of removing from heat. For right now: set the pan back over low heat for 10-15 seconds, stir gently, and pour. Do not reheat aggressively or you will overshoot and end up with a liquid glaze.
Too thin and won't set: Most likely causes are too much milk, or milk that was not hot enough to properly dissolve the sugar. If it is still too fluid after 20 minutes of cooling, place the cake in the refrigerator for 15 minutes to accelerate the set. The texture will still be good once firm. For the next batch, add milk in 1-tablespoon increments rather than all at once.
Grainy or sandy texture: Graininess means large sugar crystals formed too quickly, or cocoa was not sifted and clumped during mixing. If you catch it while the icing is still warm, strain it through a fine-mesh sieve and beat it again. If it has already set on the cake, the flavor is still excellent—graininess in fudge icing is largely a textural issue, not a safety one. To prevent it next time, sift both the cocoa powder and the powdered sugar before combining, and make sure your milk is genuinely hot.
For more cookie and brownie inspiration to pair with this icing, the Christmas Cookie Ornaments Recipe and Ultimate Guide to Cookie Displays cover presentation and finishing techniques worth bookmarking.
Variations Worth Trying
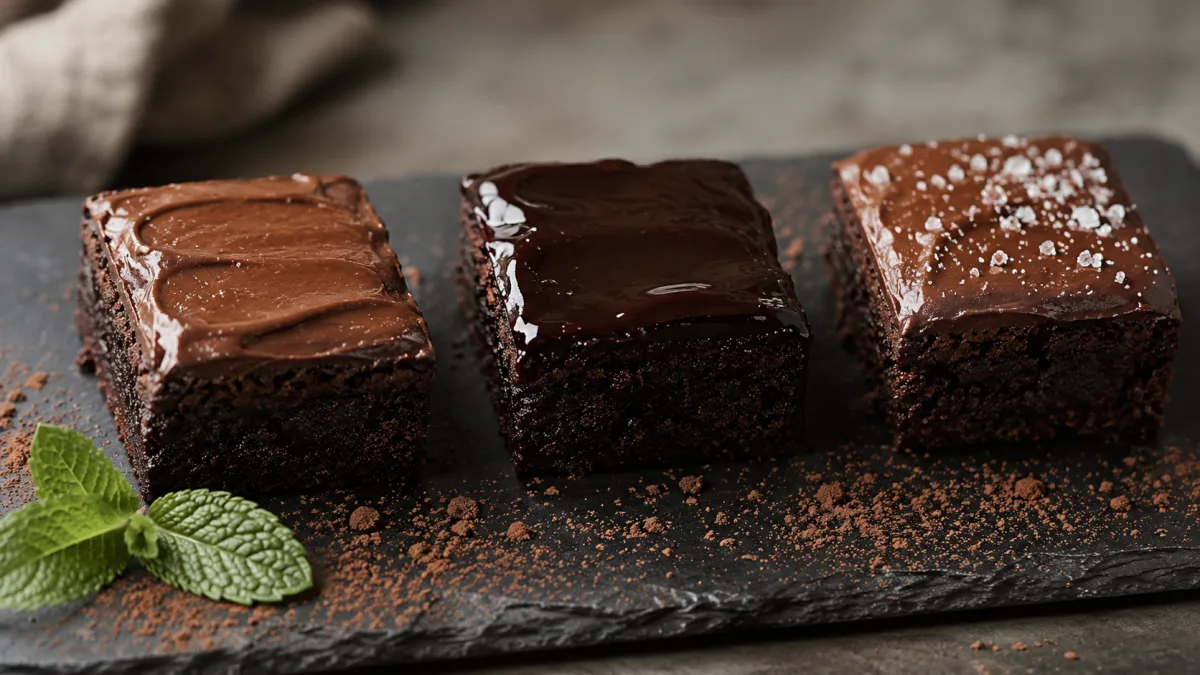
The base recipe is a strong platform for adaptation. A few changes that work well without disrupting the underlying chemistry:
- Mocha fudge icing: Replace the milk with strong-brewed coffee, cooled to hot-but-not-boiling. Coffee amplifies cocoa's natural bitter-acidic notes and produces a darker, more complex icing without adding sweetness.
- Brown butter version: Brown the butter first, let it cool for 5 minutes, then proceed. The nutty, caramelized compounds from the brown butter add a secondary flavor layer that pairs especially well with banana cake or spice cake.
- Peppermint variation: Reduce vanilla to 1/2 tsp and add 1/4 tsp peppermint extract off-heat alongside the vanilla. Mint and chocolate is a classic pairing, and the peppermint's menthol compounds sharpen the cocoa's bitterness pleasantly.
- Salted: Sprinkle flaky sea salt over the surface immediately after pouring, while the icing is still liquid enough to absorb the crystals. The salt contrasts the sweetness and rounds out the cocoa.
You can also try this icing over the Anti-Fruitcake for a more unconventional holiday dessert, or pour it over the Basic Corn Souffle as a standalone dessert souffle with a chocolate finish (though the souffle must be fully cooled first).
What to Put This Fudge Icing On
The original recipe calls it out correctly: any cake, cupcakes, or brownies. A few more specific applications:
Sheet cakes are the easiest target because you can pour directly into the pan and the edges contain the icing. Layer cakes require more confidence—pour over a warm, leveled top layer and work in a single pass. The icing grabs the cake surface and creates a thin shell that holds well for 24 hours at room temperature, no refrigeration needed.
Brownies may be the best use of this icing. The dense, chewy brownie base provides structural contrast to the thin fudge shell, and the chocolate-on-chocolate combination is deeply satisfying. Pour the icing while the brownies are still slightly warm (not hot) in the pan—the residual heat keeps the icing liquid just long enough to level itself.
Cupcakes work if you dip rather than pour: hold each cupcake inverted over the pot and dip the top into the warm icing, then right it on a rack. This gives a cleaner finish than trying to pour onto individual cupcakes. You have about 3 minutes of dipping time before the icing thickens past the point of smooth coating.
For additional baked goods to frost, the Asparagus Rolls Recipe and Easy Clambake Recipe are savory counterpoints that could round out a complete menu spread when planning an event around a showstopper cake.
Storage and Make-Ahead Notes
Once set on the cake, fudge icing stores well. A frosted cake kept at room temperature in an airtight container stays in good condition for up to 3 days. The icing will firm further as it sits, eventually developing a very slight crust on the exterior while staying moist underneath. Refrigeration firms it significantly and can cause condensation on the surface when you bring it back to room temperature—not harmful, just slightly tacky.
Do not try to make this icing ahead and reheat it later. The crystallization process, once started, does not reverse cleanly. If you reheat and restir a set batch, you risk large crystal formation and a grainy result. The right approach is to prepare everything in advance (have the cake ready, sugar and cocoa measured, milk hot) so you can execute the icing in one uninterrupted 15-minute stretch.
For a cooked frosting with better make-ahead potential, a Swiss meringue buttercream stores well in the refrigerator for up to a week. But this fudge icing trades that convenience for a depth of chocolate flavor that no buttercream matches—and that tradeoff is intentional. King Arthur Baking's fudge frosting guide confirms that cooked cocoa frostings poured over cakes set to a glossy, smooth surface that does not need refrigeration for short-term storage.
Frequently Asked Questions
Why does fudge icing get grainy sometimes?
Graininess almost always comes from one of two causes: unsifted cocoa or powdered sugar that clumped during mixing, or crystallization that started unevenly because the icing cooled too slowly. Sift your dry ingredients and pour immediately after beating to prevent it.
Can I use this fudge icing recipe on a layer cake?
You can, but act fast. Pour about half over the bottom layer and use the remaining half for the top and sides. Have both layers stacked before you pour, and work within 60 to 90 seconds per application. The icing forgives a rough edge on a sheet cake; it does not forgive hesitation on a layer cake.
What is the difference between fudge icing and chocolate ganache?
Ganache is an emulsion of chocolate and heavy cream that sets through the solidification of cocoa butter. Fudge icing sets through sugar crystallization, using cocoa powder (not chocolate bars), butter, and milk. Fudge icing is less glossy when set, has a firmer snap, and is less expensive to make since it skips the heavy cream and chocolate bars entirely.
Can I store leftover fudge icing before it sets?
No. Once you start beating the icing and it begins to lose its shine, crystallization has already begun. Stopping mid-process and reheating later produces large, gritty crystals. Make only what you need and use it immediately.
Why does the fudge icing need to lose its shine before I pour it?
The shift from glossy to semi-matte signals that the first sugar microcrystals are forming. This is the ideal pour window: the icing is still fluid enough to spread but has enough crystal nucleation to set firmly within 20 to 30 minutes at room temperature. Pouring before the shine fades means the icing stays liquid too long and may not set firmly. Waiting too long past the matte stage means it seizes before you can pour.
How much cake does this recipe cover?
One batch covers a 9x13 sheet cake with a thin layer, 12 standard cupcakes dipped individually, or an 8-inch two-layer round cake with a sparse coat. Double the recipe if you want a thick, generous layer on a sheet cake or a well-coated layer cake.
Does it matter which type of cocoa powder I use?
For this icing, no—either natural or Dutch-process cocoa works fine. There are no baking soda or baking powder leaveners in this recipe, so the pH difference between the two types does not affect rise or texture. Dutch-process gives a darker color and smoother, less acidic flavor. Natural cocoa gives a slightly brighter, more intense chocolate taste. Choose based on the flavor profile you prefer. The Southern Plate boiled chocolate icing tradition uses natural cocoa powder as the standard, which produces the classic old-fashioned flavor.

Linda Fehrman
Edits general wellness and relationship explainers. Health material is educational, avoids diagnosis and links to health-authority guidance.




In a recipe, nothing is ever measured by cans or boxes or jars. All I can think of is going online to my local grocery store and finding a picture of a box of powdered sugar, zoom in as close as I can to see how many ounces it is, and hope that is correct.
Thanks for your patience
Thanks for your patience
This is a fantastic fudge icing or whipped frosting recipe
Measure 1 cup of powdered sugar into a bowl and set aside. Measure 1/2 cup cocoa in a another bowl and set aside. Melt 1 stick of butter and 1/2 cup of cocoa in a medium sauce pan. At the same time in a small separate pan heat 1/2 cup milk until hot (not boiling).
Gradually add the premeasured sugar to the warm cocoa and butter mixture and stir until begins to thicken (it will be quite grainy) then add the hot milk and stir continuously until smooth, shiny and silky (and until reach desired thickness). Remove from heat and stir in 1tsp vanilla and the other 1/2 cup of premeasured cocoa powder. Beat until icing is smooth and starts to lose it’s shine. Immediately pour onto cake. Allow to cool before serving.
Lupe
Here how it goes: Heat milk to hot, set aside. Melt butter on top of stove add cocoa to melted butter until combined., add this mixture to sugar, then additional 1/2 unsweetened cocoa powder and vanilla. then add hot milk to consistency wanted
. It looks like she is , cocoa powder, which is unsweetened and regular cocoa , which is equal to 1 cup mixed one at the beginning and cocoa powder unsweetened at the end.
The recipe as it stands was not explanatory enough.