
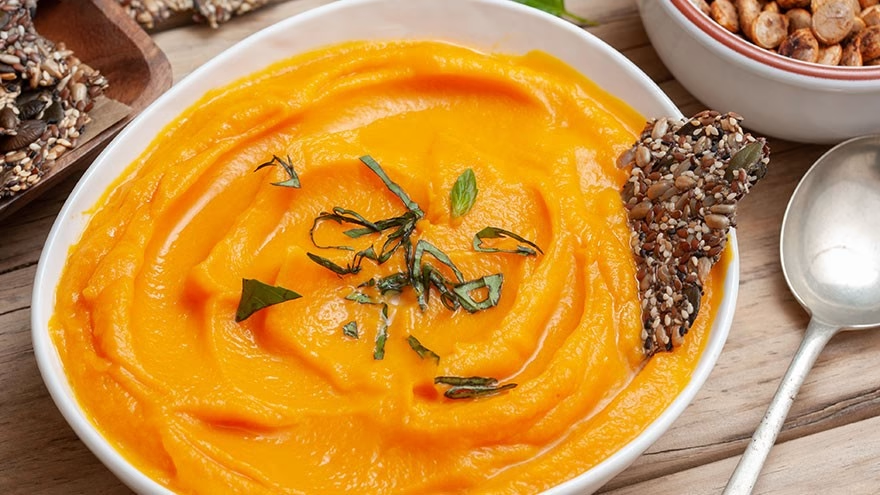
Homemade Pumpkin Puree Is About Texture
Making your own pumpkin puree is not difficult. The part that surprises people is texture. Canned pumpkin is thick and consistent. Fresh pumpkin can be watery, stringy, sweet, earthy, or bland depending on the variety and how it is cooked.
That does not make homemade puree worse. It just means you need to choose a good pumpkin, cook it until fully tender, drain it when needed, and blend it until smooth. Once you do that, the flavor can be cleaner than canned pumpkin.
The goal is thick puree, not pumpkin soup. Keep that in mind from shopping through storage.
Choose Sugar Pumpkins, Not Carving Pumpkins
The huge pumpkins sold for carving are grown for size and shape. They can be watery and bland in the kitchen. Look for sugar pumpkins, pie pumpkins, or small cheese-type pumpkins. They feel heavy for their size and usually have denser flesh.
Choose pumpkins with firm skin, no soft spots, and a dry stem. A dull patch where the pumpkin rested on the ground is normal. Avoid pumpkins that smell sour or feel spongy.
University of Illinois Extension's pumpkin selection and use guidance is a useful reference because it separates decorative pumpkins from better cooking choices.
If you are planning a fall dessert table, puree is only one part of the job. Livecub's Ultimate Guide to Cookie Displays can help with the dry baked goods while pumpkin handles pies, cakes, and custards.
Wash, Cut, and Seed the Pumpkin
Wash the outside before cutting. Dirt on the rind can move onto the flesh when the knife passes through. The FDA's produce safety guidance gives the same basic rule for firm produce: clean the surface even if you will not eat the peel.
Cut the pumpkin in half with a sturdy knife on a stable board. Scoop out seeds and stringy pulp with a spoon. Save the seeds for roasting if you like, but keep them separate from the puree work so the counter stays organized.
Do not fight a rolling pumpkin. If it wobbles, slice a thin piece from one side to create a flat base before cutting deeper.
Roasting Gives the Best Flavor
Roasting concentrates flavor and makes the flesh easy to scoop. Place pumpkin halves cut side down on a parchment-lined baking sheet. Roast at 375 F until the flesh is very tender when pierced, usually 40 to 60 minutes depending on size.
Cut-side-down roasting traps steam and softens the pumpkin without drying the surface too much. If you want a slightly deeper flavor, turn the halves cut side up for the last 10 minutes, but watch closely so the edges do not scorch.
Steaming also works, especially for small pieces, but it usually leaves more water behind. Boiling is the least useful method for puree because the pumpkin can absorb water and taste thin.
For dishes where pumpkin is one ingredient among many, extra moisture may not matter. For pie, cheesecake, cookies, or filled pastry, watery puree can cause trouble. Livecub's How to Make the Perfect Tiramisu is unrelated in flavor, but it teaches the same dessert lesson: moisture control shapes texture.
Expect It to Differ From Canned Pumpkin
Canned pumpkin is processed for consistency. Homemade puree changes from pumpkin to pumpkin, so judge it before adding it to a recipe. Color may be lighter, flavor may be fresher, and water content may be higher.
That difference is fine in soup, pancakes, and pasta sauce. It matters more in pie, bars, cookies, and cheesecake, where extra water can loosen the filling or make the crumb heavy.
The best habit is simple: taste it, check thickness, and adjust the recipe before baking. Do not assume one fresh pumpkin will behave like the last one in your kitchen at all.
Blend, Drain, and Adjust
Let the cooked pumpkin cool until you can handle it. Scoop the flesh from the skin and blend it in a food processor until smooth. A potato masher works for rustic soup, but it will not give the clean texture most pies need.
If the puree looks loose, drain it in a fine-mesh sieve lined with cheesecloth or a clean thin towel. Even 30 minutes can remove enough water to improve baking. For very watery pumpkin, drain longer in the refrigerator.
Do not season the full batch unless every future recipe needs the same flavor. Plain puree gives you more options: pie, soup, bread, pancakes, pasta filling, and sauces.
If you like batch prep, Livecub's How to Freeze Fresh Vegetables fits the same kitchen rhythm: cool food properly, portion it, label it, and protect it from freezer air.
Thicken Puree for Baking
Pie and quick bread need thicker puree than soup. If draining is not enough, cook the puree in a wide saucepan over low heat, stirring often. The goal is to release steam without browning the pumpkin.
Measure after thickening. A cup of watery puree is not the same as a cup of thick puree. If the recipe was built for canned pumpkin, match that dense spoonable texture before mixing the filling or batter.
For a smoother pie, press the puree through a fine sieve after blending. This step is not always needed, but it helps if the pumpkin was fibrous or if the dessert needs a silkier finish.
Use Pumpkin Puree in Sweet and Savory Food
For pie, measure the puree after draining, not before. If a recipe was written for canned pumpkin, your homemade puree may need extra draining to match the thickness. A spoon should stand in it briefly before slumping.
For soup, the puree can be looser. Add stock, onion, garlic, ginger, sage, or cream depending on the flavor you want. For pasta, mix thick puree with cheese, herbs, and a little salt. For pancakes or muffins, reduce other liquid slightly if the puree is wet.
Sweet toppings should support pumpkin rather than smother it. Livecub's Mom's Best Fudge Icing belongs on chocolate cake, while pumpkin desserts usually prefer cream cheese, maple, brown butter, or lightly sweetened whipped cream.
Roast the Seeds Separately
Pumpkin seeds should not go into the puree bowl. Pull them from the stringy pulp, rinse them, dry them well, and roast them on their own with oil and salt. They are a snack, not a puree ingredient.
Dry seeds roast better. If they go into the oven wet, they steam first and brown unevenly. Spread them in one layer and stir once or twice while roasting.
Freeze Puree Safely
Refrigerate puree you will use soon, and freeze the rest in measured portions. One-cup portions are handy for soup, quick bread, pancakes, and sauces. Flatten freezer bags so they stack and thaw faster.
The National Center for Home Food Preservation warns against canning mashed or pureed pumpkin at home; its pumpkin and winter squash guidance recommends canning only cubed pumpkin with tested directions. For smooth puree, freezing is the practical home method.
Label each portion with the date and amount. Thaw in the refrigerator, then stir before using because some water may separate. Drain again if the recipe needs a thick puree.
Fix Common Pumpkin Puree Problems
If the puree tastes bland, roast the next pumpkin longer or choose a smaller pie pumpkin. If it tastes watery, drain it more. If it is fibrous, blend longer or pass it through a sieve for a smoother finish.
If the puree is too thick for soup, loosen it with stock or milk. If it is too thin for pie, drain it and consider cooking it gently in a saucepan to evaporate more moisture, stirring often so it does not scorch.
Homemade puree is not about proving canned pumpkin wrong. It is about having a fresh, flexible ingredient ready for the dishes where its flavor actually shows.
Frequently Asked Questions
What pumpkin is best for puree?
Use sugar pumpkins, pie pumpkins, or small cheese-type pumpkins. Avoid large carving pumpkins if you want dense, sweet flesh.
Is roasting better than boiling?
Yes for most puree. Roasting concentrates flavor and avoids adding extra water. Boiling often makes pumpkin taste thin.
Can homemade pumpkin puree replace canned pumpkin?
Yes, but drain it well first. Canned pumpkin is thick, so fresh puree may need moisture removed before baking.
Can pumpkin puree be canned at home?
Smooth pumpkin puree should be frozen, not canned at home. Use tested canning guidance only for cubed pumpkin.

Alyssa Curlin
Edits general health, nutrition and education explainers. Medical topics are educational and link to public-health guidance.




Leave a reply
Replying to