
Start With Control, Not Range
How to Use the Reformer to Open & Strengthen Hips begins with a simple rule: the biggest stretch is not always the best stretch. The reformer rewards smooth control, not forcing the carriage farther.
Hips need both mobility and strength. If you only chase flexibility, the joint may feel loose but unsupported. If you only push strength, the movement may get stiff.
The reformer works best when the carriage moves because you control it.
Check Whether This Work Fits Your Body
If you have hip pain, recent surgery, joint replacement, nerve symptoms, pregnancy-related pelvic pain, or a current injury, get guidance from a qualified clinician or trained instructor before doing reformer hip work.
The AAOS hip conditioning program says exercise programs should be performed under a doctor's or physical therapist's supervision to be safe and effective for the individual.
Discomfort from effort is different from sharp, catching, or increasing pain.
Set Springs for Skill
Heavy springs are not automatically stronger. For hip work, the right spring load lets you keep the pelvis steady, move through a clean line, and return the carriage without snapping.
If the carriage slams, the spring may be too heavy or your control may be fading. If the movement feels shaky and unsupported, you may need more spring or a smaller range.
Use the equipment settings taught by your instructor, because reformers vary by brand and studio setup.
Place the Pelvis Before the Legs Move
Before each exercise, notice whether the pelvis is level, tipped, or rotated. A small change in pelvic position can turn a hip exercise into lower-back strain.
Use a neutral or teacher-directed pelvic position and keep the ribs from flaring. If the pelvis moves first every time the leg moves, reduce the range.
This setup work may feel slow, but it teaches the hip to move without stealing motion from the spine.
Warm Up Before Deep Stretching
Mayo Clinic's stretching guide recommends warming up with light activity before stretching, moving gently, avoiding bouncing, breathing, and stopping if a stretch causes pain.
On the reformer, a warmup might include footwork, pelvic curls, easy bridging, or gentle legs-in-straps arcs. The point is to wake up the hips before asking for length.
Do not start with the deepest side split of the day. Earn range gradually.
Use Footwork to Find Alignment
Footwork teaches the hips to track with the knees and feet. Lie supine, place the feet on the footbar, and press the carriage out without locking the knees.
Keep the pelvis heavy and even. Watch that the knees do not collapse inward or drift far outside the feet. Try parallel heels, toes, and a small turnout if those positions feel comfortable.
Livecub's jump board reformer guide is a separate skill, but good hip tracking starts with the same quiet control.
Bridge for Glutes and Hip Extension
Reformer bridging can train the back of the hips without yanking on the front. Start with the carriage still, feet grounded, and spine rolling up only as far as control allows.
Keep weight even across both feet. If one hip lifts faster, lower down and try a smaller bridge. Strong glutes help the hips extend without dumping pressure into the lower back.
A clean small bridge is better than a high bridge with a twisted pelvis.
Use Straps for Smooth Hip Mobility
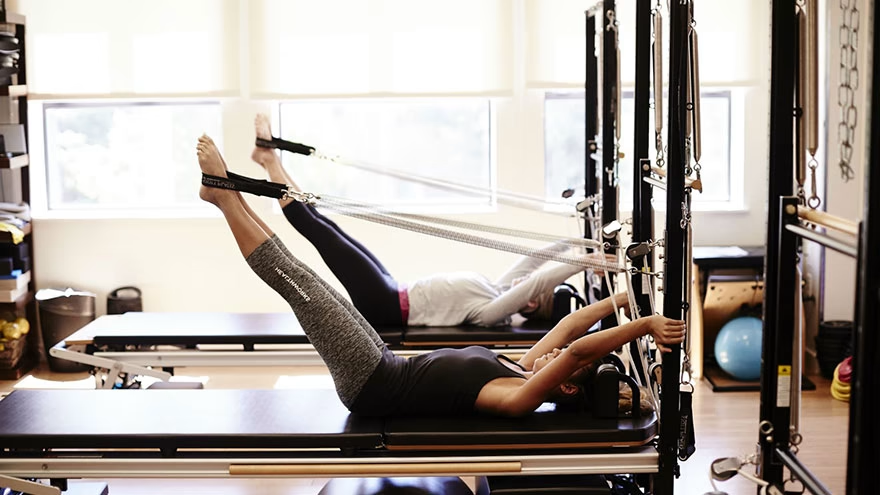
Legs in straps can open the hips through arcs, circles, frogs, and lower-lift patterns. Keep the sacrum steady and move the legs from the hip sockets rather than from momentum.
Start with small circles. If the pelvis rocks, the range is too large or the spring tension is not right for your current control.
Balanced Body's article on Pilates hip extension on the reformer describes reformer work that uses hip extension, rotation, and balance for tight muscles and mobility.
Add Side-Lying Work for Outer Hips
Side-lying strap work can train gluteus medius and the outer hip. Keep the waist long, ribs quiet, and pelvis stacked instead of rolling backward.
Move the top leg through a controlled path. If you feel the front hip gripping hard, reduce the range or adjust the angle.
For another low-impact comparison, Livecub's Pilates or Tai Chi guide can help readers think about movement styles, balance, and control.
Approach Side Splits With Respect
Side splits can feel like the signature hip opener on the reformer, but they require attention. Use appropriate springs, keep the standing leg stable, and move both the carriage and the return slowly.
Do not chase a wide split if the knees twist, the arches collapse, or the pelvis tips forward. Range should come from the hips, not from losing alignment elsewhere.
The return phase matters as much as the opening phase.
Train Rotation Gently
Hip rotation is useful for daily movement, sports, and dance, but forced turnout can irritate the joint. Use small ranges first and keep the pelvis from sliding around to fake rotation.
Frog patterns, small circles, and controlled turnout in footwork can build awareness. The movement should feel smooth, not pinchy.
If rotation causes catching, sharp pain, or a blocked feeling, stop and ask for professional guidance.
Avoid the Common Cheat Patterns
Hip exercises often get borrowed from nearby joints. The ribs flare, the low back arches, the knee twists, or the foot grips hard to create the appearance of more range.
Use mirrors, instructor feedback, or slower tempo to spot those patterns. If the hip cannot move cleanly through the chosen range, make the range smaller.
Clean movement is more useful than a dramatic shape.
Use Breath to Control Tension
Breath helps keep the ribs, pelvis, and hip flexors from bracing. Inhale to prepare. Exhale during the effort or return, depending on the exercise and teacher cue.
If you hold your breath, you may also grip the hip flexors and lower back. Slow the exercise until breathing feels steady again.
Livecub's basic aerobic steps guide is a different movement format, but rhythm and breath still affect coordination.
Progress One Variable at a Time
Change only one thing when advancing: spring load, range, tempo, body position, or repetitions. Changing all of them at once makes it hard to know what your hips tolerated.
A simple progression might be smaller circles, larger circles, a slower return, then a lighter spring. If form drops, return to the previous version.
Progress should look cleaner, not merely harder.
Stop for the Right Reasons
Stop if you feel sharp pain, numbness, catching, dizziness, or a feeling that the joint is not stable. Stop if fatigue makes the carriage slam or the pelvis twist.
Hip work should leave you feeling more organized, not irritated for the rest of the day. Mild muscle effort is normal; joint pain is a different message.
Ask an instructor to watch your spring choice, foot position, and pelvic control before assuming the exercise is wrong for you.
After Class, Notice the Next Day
The next day tells you whether the session was a good dose. Mild muscle soreness may be fine. Sharp joint pain, limping, or symptoms that increase after class are signs to scale back.
Keep a simple note of springs, exercises, and how the hips felt afterward. Patterns help you and your instructor choose better progressions.
If one side consistently feels different, do not force symmetry. Train control and ask for guidance.
Pair Strength With Daily Movement
Reformer work helps most when the rest of the day supports it. Long sitting can leave the hip flexors stiff, while sudden intense training can overload tissues that are not prepared.
Walk, change positions, and use gentle mobility between sessions if your body tolerates it. The reformer is one tool, not the whole hip plan.
Bring daily habits into the conversation if the same tightness returns every class.
Frequently Asked Questions
Can the reformer help tight hips?
It can help many people train hip mobility and control, especially when exercises are chosen carefully and not forced into painful ranges.
Which reformer exercises strengthen hips?
Footwork, bridging, legs in straps, side-lying strap work, scooter variations, and controlled side splits can all train different hip muscles.
Should hip work hurt on the reformer?
No. Muscle effort is normal, but sharp pain, catching, numbness, or increasing joint pain means you should stop and get guidance.
How often should I do reformer hip exercises?
Frequency depends on fitness level, recovery, and goals. Many people do best with consistent moderate practice rather than one intense session.

Chiara Bradshaw
Covers education, culture and creative topics with an emphasis on readable explanations and verifiable references.
Leave a reply
Replying to