
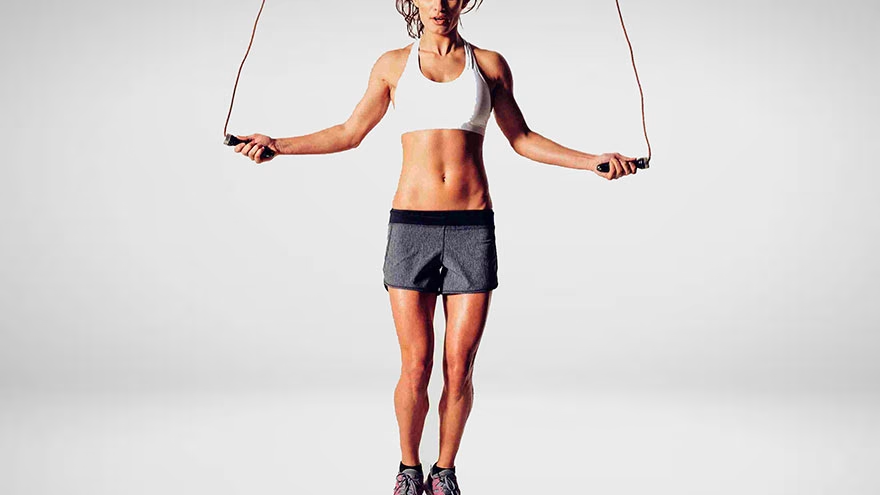
Start With Fit Before You Cut Anything
How to adjust a jump rope with a wooden handle is mostly a patience job. The rope may look too long the first time you swing it, but cutting too early can ruin a rope that only needed a knot moved or a handle reset.
A good jump rope length gives enough clearance over the head and under the feet without dragging, slapping the floor too far in front, or forcing the shoulders to lift. Wooden handles make the process simple, but they are not all built the same.
Measure, test, adjust, then cut. That order protects the rope and your shins.
Check the Rope Length Against Your Body
Stand on the middle of the rope with one foot and pull the handles upward evenly. For many beginners, the handles should reach somewhere around the armpits or upper chest. More skilled jumpers may prefer less extra rope, but a beginner usually needs forgiveness.
Nike's jump rope sizing guide notes that a common beginner starting point is a rope about three feet taller than the jumper, while current-rope checks can be done by standing on the center and pulling the handles up. Use that as a starting point, not a law.
If you are using jump rope as part of broader cardio, pair the setup with simple movement options from Livecub's What Are Basic Aerobic Steps?. Rope length matters, but so does having alternatives on days your calves need rest.
Open the Wooden Handle Carefully
Many wooden-handle ropes hold the cord with a knot, washer, staple, small clamp, or plastic insert inside the handle. Look at the bottom or top of the handle before pulling hard. Some caps twist off, while others slide or pry gently.
Work over a table so small parts do not roll away. If the handle has a metal pin or staple, do not yank it loose unless you understand how it will go back. Old wooden handles can crack if forced.
Photograph the original setup. One quick picture makes reassembly easier if a washer or knot order is less obvious than expected.
Shorten With a Temporary Knot First
Before trimming the rope, make a temporary knot near the handle or move the existing knot farther down the cord. Reassemble the handle enough to test the length. Jump lightly for 20 to 30 seconds.
Listen and feel. A rope that is too long hits far ahead of the toes and may feel slow. A rope that is too short clips the feet or forces the arms wide. The right length swings quietly with the hands near the hips.
Temporary adjustment is cheap insurance. Once a rope is cut, the only fix is a new rope, a connector, or a shorter user.
Test With Your Real Jumping Style
Do not test only by standing still. Try basic bounce, alternate-foot steps, and a few slow turns. If you plan to learn speed work, the rope may need less clearance. If you are learning general fitness jumping, a little more clearance is easier.
The CDC's adult physical activity guidance supports a mix of aerobic activity and muscle-strengthening work. Jump rope can contribute to aerobic work, but it should be built gradually because the feet, calves, and ankles absorb repeated impact.
If impact bothers you, Livecub's How to Do Chair Dancing can be a useful lower-impact cardio choice while you adjust training volume.
Choose a Beginner Jump Rope Routine
Once the rope is adjusted, do not start with a long session. Try ten rounds of 20 seconds of easy jumping and 40 seconds of rest or marching. Stop before the shoulders, calves, or feet become sloppy.
Skill comes before conditioning. A rope that fits well still needs rhythm. Keep jumps low, land softly, and let the wrists turn the rope instead of swinging from the shoulders.
If the rope catches every few turns, shorten the work interval rather than forcing a long round. Clean repetitions teach more than an exhausting tangle.
Trim Only After Several Tests
When the temporary knot feels right, mark the cord inside the handle. Remove the handle again, measure twice, and leave a small extra tail if the handle has room. Cut with sharp scissors, a utility blade, or a cable cutter depending on the rope material.
For cotton or woven rope, wrap the cut point with tape before cutting to reduce fraying. For plastic-coated cable, use the correct cutter so the end does not crush. Some ropes need a melted or capped end, but do that only if the material allows it safely.
Leave a little adjustability if more than one person might use the rope. A rope cut for speed by one user may be useless for another.
Reassemble the Handle So It Spins Freely
Put the knot, clamp, washer, or insert back in the same order. Pull gently to seat the cord. The handle should spin without grinding, catching, or exposing a sharp cord end.
If the rope twists inside the handle, open it again and straighten the cord before tightening. A wooden handle that binds can make the rope feel uneven even when the length is correct.
Store the rope hanging or loosely coiled. Tight knots and heavy objects can kink the rope and change how it turns.
Maintain Wooden Handles
Wooden handles can last a long time if they stay dry and smooth. Wipe sweat after use and let the rope air out before storing it in a bag.
If the handle feels rough, use very fine sandpaper lightly and clean away dust before the next workout. Avoid adding tape that makes the handle too thick or sticky unless grip is truly a problem.
Check the cord hole occasionally. A sharp edge inside the wood can wear the rope and undo your careful adjustment.
Use the Right Surface and Shoes
A good length will not save a poor surface. Concrete is hard on the body and the rope. A wood floor, rubber gym floor, smooth mat, or outdoor court is usually friendlier.
Wear supportive shoes that let you land softly. Jump low, keep the elbows near the ribs, and turn the rope mostly from the wrists. Big arm circles are a sign that the rope length, rhythm, or technique needs work.
For a stronger conditioning day, Livecub's Benefits of Running Bleachers should be treated as a separate training stress, not stacked carelessly with long jump-rope sessions.
Fix Common Adjustment Problems
If the rope keeps hitting your toes, add a little length if possible or slow the swing. If it slaps the floor far ahead of you, shorten it slightly. If one side feels uneven, compare both handle exits and check that the center mark is truly centered.
If the handles feel rough, sand splinters lightly and avoid varnish or tape that makes them slippery. If the cord frays near the handle, the internal hole may have a sharp edge that needs smoothing or a small washer.
Know When to Replace the Rope
Some ropes are not worth saving. Replace the rope if the cord is deeply frayed, the wooden handle is cracked, the internal hardware will not hold, or the rope twists so badly that it cannot turn evenly.
A bad rope makes learning harder. If you have adjusted, tested, and still fight the rope every session, the problem may be the rope rather than your coordination.
Adjusting a wooden-handle jump rope is not complicated. The skill is resisting the urge to cut before the rope has proved what it needs. Test again after one full workout, then make any final small change with calm hands and fresh legs.
Frequently Asked Questions
How long should a jump rope be?
A common beginner check is to stand on the center and see whether the handles reach around the armpits or upper chest. Skill and style change the preference.
Can a wooden-handle rope be adjusted without cutting?
Often yes. Many can be shortened temporarily by moving a knot or clamp inside the handle. Test that before trimming.
What if I cut the rope too short?
There is usually no clean fix. You may need a replacement rope or a connector, so trim only after several tests.
Why does my rope keep hitting my feet?
It may be too short, swinging too slowly, or turning from wide arm circles. Check length and keep the hands near the hips.

Linda Fehrman
Edits general wellness and relationship explainers. Health material is educational, avoids diagnosis and links to health-authority guidance.

Leave a reply
Replying to