
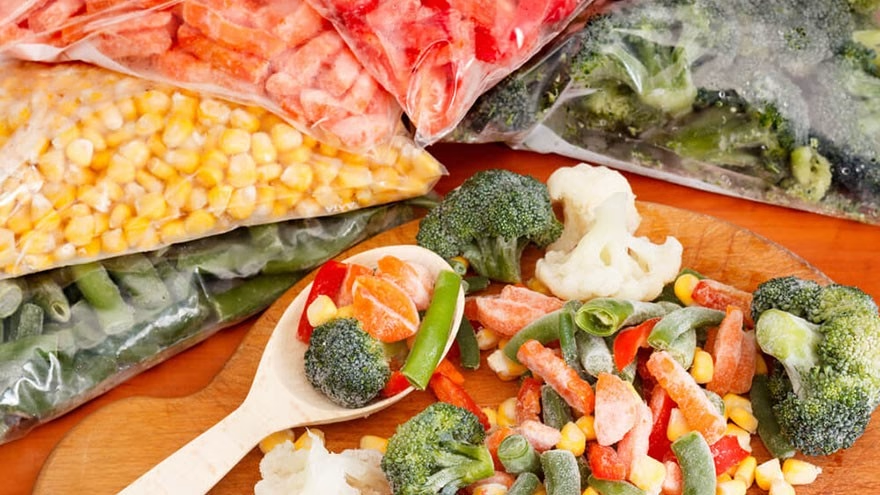
Most home cooks blanch vegetables before freezing because a recipe told them to. Fewer understand what they're actually stopping. Inside every fresh vegetable, enzymes called peroxidase and catalase keep working even after harvest — breaking down color, flavor, and texture at a slow but steady pace. Cold temperatures slow these enzymes down; they do not shut them off. A broccoli floret stored at 0°F will still fade and develop off-flavors over weeks if those enzymes remain active. Blanching — a brief plunge into boiling water — denatures the enzyme proteins, permanently unfolding their three-dimensional structure so they can no longer catalyze reactions. That's the reason behind the step, and it's why the USDA's National Center for Home Food Preservation calls blanching "a must for almost all vegetables to be frozen." Learning how to freeze fresh vegetables properly starts with understanding that single mechanism.
Why do you need to blanch vegetables before freezing?
The short answer is enzyme inactivation, but the details matter. Peroxidase and catalase are among the most heat-resistant enzymes in vegetables, which is why they're used as indicator tests for blanching effectiveness — if peroxidase is inactivated, less heat-resistant enzymes are certainly gone too. Underblanching is actually worse than no blanching at all: a brief heat exposure stimulates enzyme activity rather than stopping it, accelerating color loss and off-flavor development. Overblanching, on the other side, causes its own damage — water-soluble vitamins leach into the water, and textures soften beyond what's useful. Timing precision is not optional.
Beyond enzymes, blanching accomplishes several things at once. It brightens color by releasing trapped air between cells, making greens appear more vivid. It reduces surface microorganisms. It wilts or softens dense vegetables like broccoli and Brussels sprouts, making them easier to pack without air pockets. Those air pockets matter because oxygen trapped in a container drives freezer burn — ice crystals form on exposed surfaces, creating the grayish, desiccated patches that are safe to eat but unpleasant in texture.
One common question: can you skip blanching entirely? A handful of vegetables — chopped peppers, grated zucchini, raw tomatoes, and most fresh herbs — are typically frozen without it, either because their enzyme activity is low enough to be inconsequential over a normal storage window, or because they're destined for cooked applications where minor texture changes don't matter. For almost everything else, blanching is not a shortcut you want to take. If you're planning to grill vegetables after thawing, texture held through proper blanching will make a notable difference.
What you need to freeze vegetables at home
The process requires no specialized equipment beyond what most kitchens already hold. Before you turn on the stove, gather everything in one place — the blanching window for smaller vegetables like peas is only 90 seconds, which leaves no time to hunt for a colander mid-process.
You'll need a large pot with a lid (at least 8 quarts for a standard blanching batch), a wire basket or blanching insert to lower vegetables in and out of the water quickly, a colander, and a large bowl or clean sink. For the ice bath, budget roughly one pound of ice per pound of vegetables. On the storage side, you'll want heavy-duty freezer bags or rigid freezer-safe containers, a permanent marker, and a baking sheet for the flash-freeze step. Thin sandwich bags are not an adequate substitute for proper freezer bags — they allow too much moisture vapor exchange and will produce freezer burn within weeks. If you vacuum-seal, the results are even better, removing the residual oxygen that drives oxidation through the bag wall.
Step 1: Prep your vegetables
Wash all vegetables under cold running water and scrub root vegetables with a brush. Trim stems, blossom ends, and any blemished sections — bruised tissue doesn't freeze any better than it stores in the refrigerator. Cut everything to roughly the size you plan to cook with later. Uniform sizing isn't aesthetic preference; it's a blanching requirement. A batch of broccoli that includes both tiny florets and thick stems will emerge from the water with the thin pieces overblanched and the thick ones still active with enzymes.
Fill your blanching pot with water — one gallon per pound of prepared vegetables — and bring it to a full rolling boil before adding anything. If the water doesn't return to a boil within one minute of adding the vegetables, the NCHFP notes you've overloaded the pot. Work in smaller batches rather than trying to rush volume. While the water heats, fill your sink or a large bowl with ice and cold water. The ice bath needs to be at 60°F or below; warm tap water will not arrest the cooking process fast enough, and carry-over heat will continue softening the vegetables even after they leave the pot.
Step 2: Blanch and chill
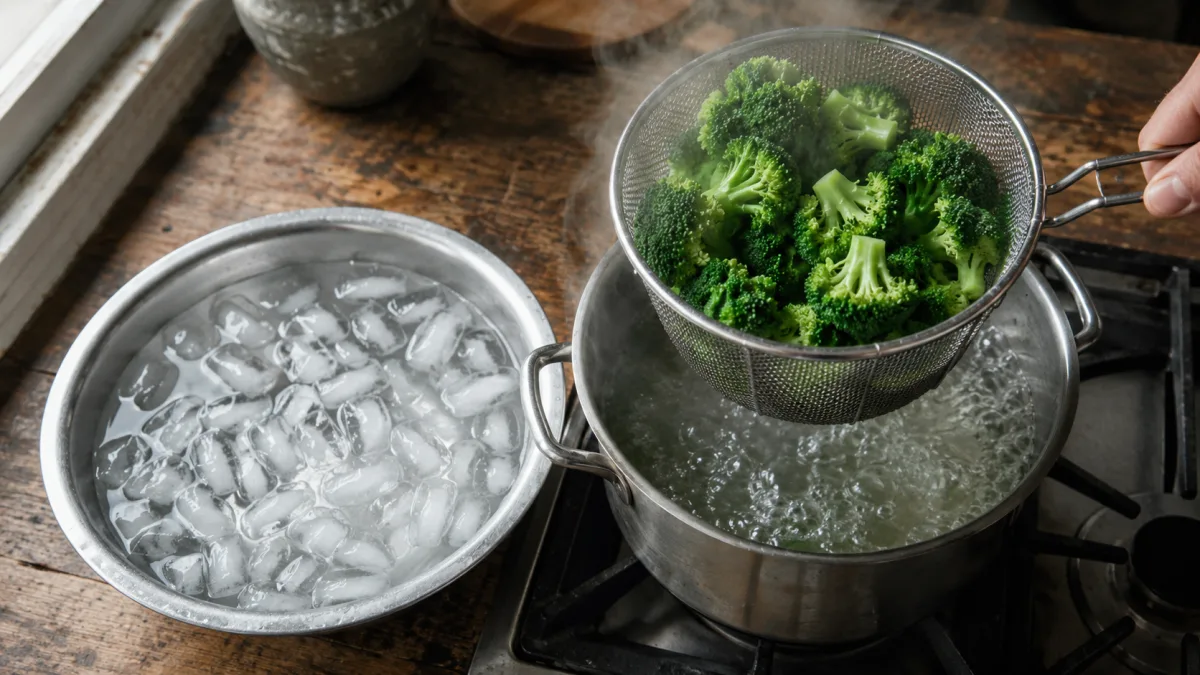
Lower the prepared vegetables into the boiling water using the blanching basket. Start timing the moment the water returns to a full boil — not when the vegetables first hit the water. Keep the heat on high throughout. The blanching times in the table below are calibrated to this method; counting from the moment vegetables enter the pot (before the water recovers) will consistently underblanch.
Steam blanching is a valid alternative, particularly for broccoli, pumpkin, sweet potatoes, and winter squash. Set a tight-lidded pot with a basket at least three inches above an inch of water, bring to a boil, arrange vegetables in a single layer so steam reaches all surfaces, and add approximately 50% to the standard water-blanching time. The advantage is nutrient retention — water-soluble vitamins like vitamin C leach significantly less into steam than into boiling water. The disadvantage is slower heat penetration, which is why the longer timing is critical.
Microwave blanching, despite seeming convenient, is not recommended by the NCHFP. Research has shown that it heats vegetables unevenly, meaning some portions may reach full enzyme inactivation while others do not — exactly the underblanching problem described above, just less visible.
The moment the timer goes off, lift the basket from the water and transfer the vegetables immediately into the ice bath. Do not let them sit in hot steam or air, even briefly — residual heat in the vegetable mass continues cooking from the inside out. Cooling should take the same amount of time as blanching: two minutes of blanching means two minutes in the ice bath. The water temperature will rise as you cool successive batches; add more ice to keep it at or below 60°F. Once cool to the touch, drain thoroughly. Surface moisture freezes into ice crystals that glue pieces together and degrade texture over time. Pat dry if needed, especially for watery vegetables like zucchini. For more ways to put just-blanched vegetables to work, see our guide to cooking greens.
Step 3: Freeze and store properly
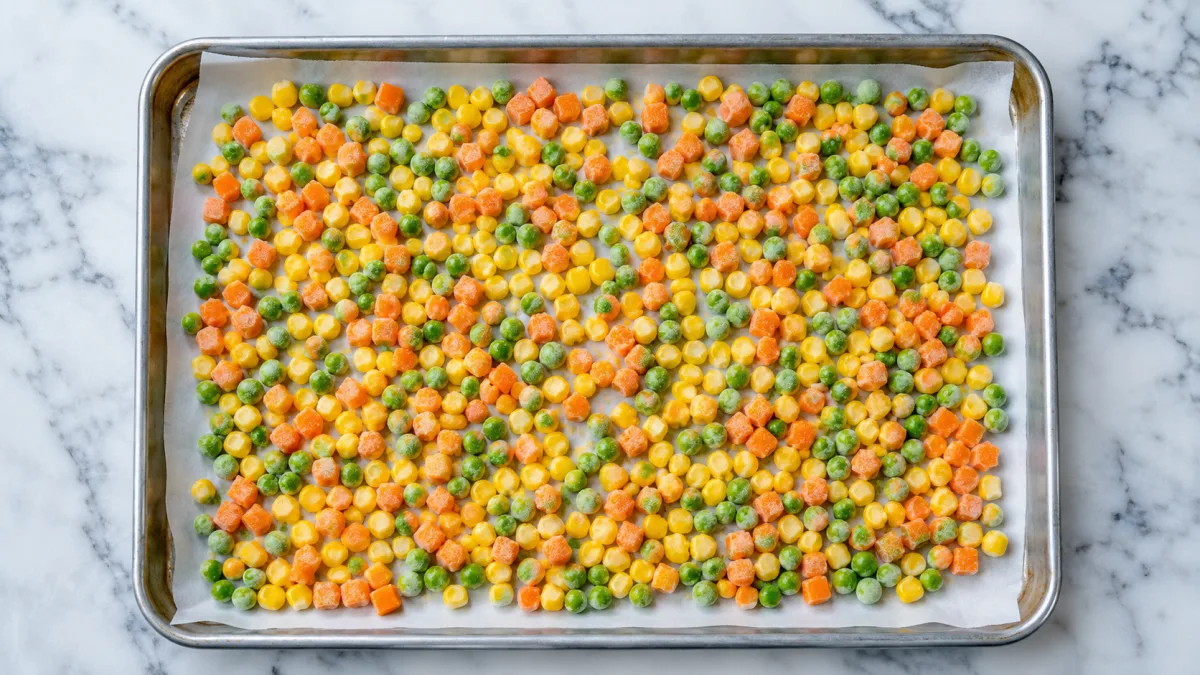
This is the step most tutorials skip, and skipping it is exactly why home-frozen vegetables so often thaw as a solid clump. Before bagging anything, spread the drained vegetables in a single layer on a parchment-lined baking sheet and slide it into the freezer for one to two hours. This flash-freezing step freezes each piece individually so they don't fuse together. Once the pieces are solid, transfer them to freezer bags or rigid containers in portion-sized amounts — whatever you'd use in one cooking session.
Removing air from the package is not optional if you want the full storage window. Freezer bags should be sealed with the air pressed out by hand, or vacuum-sealed if you have the equipment. Rigid containers should be filled with as little headspace as possible, though liquid-packed vegetables need about half an inch of headspace for expansion. Label every container with the vegetable name and the date it was frozen — use a permanent marker or freezer tape, since standard tape adhesive fails at low temperatures.
According to the USDA National Center for Home Food Preservation, properly frozen and packaged vegetables maintain best quality for 8 to 12 months at 0°F. The original 18-month figure circulates widely but is not current USDA guidance. After 12 months, the vegetables are still safe — freezing halts microbial growth indefinitely — but flavor, color, and texture will have declined. Apply a simple first-in, first-out system: new batches go to the back of the freezer, older bags come to the front. Freezer burn (ice crystals on the food surface, grayish color) is a packaging failure, not a safety issue, but affected portions are best trimmed before use. Pair your preserved harvest with fresh sauces — our 6 stir-fry sauces work well with nearly any frozen vegetable combination.
Blanching times for common vegetables
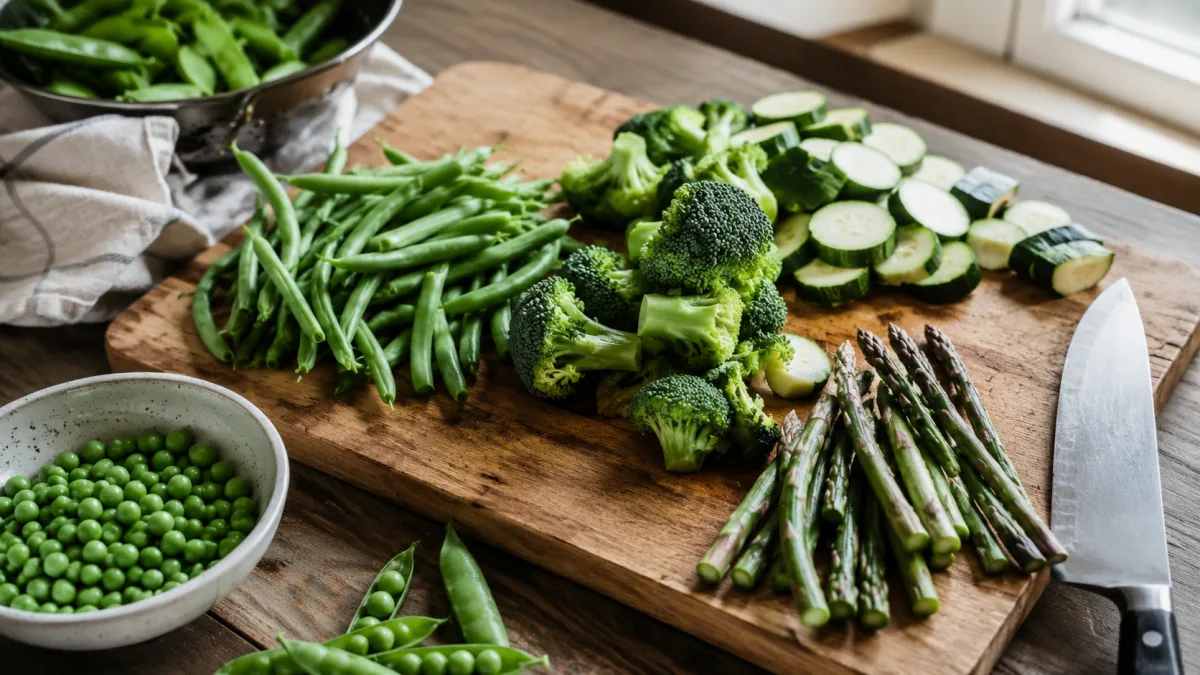
The times below are drawn from the USDA National Center for Home Food Preservation (nchfp.uga.edu), based on the University of Georgia Cooperative Extension's So Easy to Preserve, 6th edition. All times are for water blanching unless noted. Steam blanching adds approximately 50% to each time.
| Vegetable | Preparation | Blanching Time (minutes) |
|---|---|---|
| Asparagus | Small stalks | 2 |
| Asparagus | Medium stalks | 3 |
| Asparagus | Large stalks | 4 |
| Basil | Leaves (most other herbs freeze raw or in ice cubes) | 1 |
| Beans — snap, green, or wax | Whole or cut | 3 |
| Beans — lima, butter, or pinto | Small / Medium / Large | 2 / 3 / 4 |
| Broccoli | Flowerets 1½ inches across | 3 (water) / 5 (steam) |
| Brussels sprouts | Small / Medium / Large heads | 3 / 4 / 5 |
| Cabbage | Shredded | 1½ |
| Carrots | Whole small | 5 |
| Carrots | Diced, sliced, or strips | 2 |
| Cauliflower | 1-inch flowerets (add 1 T. vinegar to water to preserve color) | 3 |
| Celery | Sliced or diced | 3 |
| Corn on the cob | Small ears | 7 |
| Corn on the cob | Medium ears | 9 |
| Corn on the cob | Large ears | 11 |
| Corn — whole kernel or cream style | Cut from blanched ears | 4 |
| Eggplant | Slices or cubes | 4 |
| Greens (spinach, kale, chard) | Leaves | 2 (3 for collards) |
| Kohlrabi | Whole | 3 |
| Kohlrabi | Cubes | 1 |
| Mushrooms | Whole (steam) | 5 |
| Mushrooms | Buttons or quarters (steam) | 3½ |
| Okra | Small pods | 3 |
| Okra | Large pods | 4 |
| Onions | Blanch until center is heated (3–7 min); rings 10–15 sec. Can also freeze raw (chopped) for cooking use. | 3–7 |
| Peas — green | Shelled | 1½ |
| Peas — edible pod | Whole pods | 1½–3 |
| Peppers — sweet bell | Halves / Strips or rings (can also freeze raw for cooking use) | 3 / 2 |
| Potatoes — new (Irish) | Whole small | 3–5 |
| Rutabagas / Parsnips | Cubed | 2–3 |
| Squash — summer / zucchini | Slices or chunks (grated zucchini can freeze raw) | 3 |
| Tomatoes | Whole or chopped — freeze raw; blanching not needed | — |
| Turnips | Cubed | 2 |
Source: USDA National Center for Home Food Preservation — Blanching Times. Note that corn-on-the-cob times vary by ear size (7, 9, and 11 minutes for small, medium, and large) — the common "8 minutes flat" advice cited elsewhere is an approximation, not USDA guidance.
Which vegetables should you NOT freeze?
Blanching solves the enzyme problem but not the structural one. Many vegetables are built around high water content held within rigid cell walls. When water freezes it expands, rupturing those walls. The vegetable thaws with the water now outside the cells — and no structure to hold it. The result is a watery, limp product that may taste fine but has a consistency closer to wet paper than fresh produce.
Lettuce and other salad greens are the clearest example. Cucumbers, with roughly 96% water content by weight, collapse to a spongy texture that's unpleasant in any preparation that expects crunch. Radishes behave similarly. Raw whole potatoes are problematic for a different reason: the starch structure changes at freezer temperatures, producing a granular, mealy texture on thawing and an unexpected sweetness from starch converting to sugars. (Cooked potatoes, mashed or in soups, freeze quite well — the cell structure has already been broken.)
Celery can be frozen but will lose all crispness, making it useful only as a cooked ingredient. The same applies to raw cabbage beyond brief stir-fry use — although blanched shredded cabbage holds reasonably well. Tomatoes freeze raw without blanching and hold up well because they're almost always used in cooked applications (sauces, soups, stews) where softened texture is expected. Whole bulb onions change texture after freezing but chopped onions for cooking work fine raw-frozen. For those planning to incorporate thawed vegetables into baked dishes or roasts, see also our guide to grilling vegetables for ideas on what to do with freshly thawed produce.
Frequently Asked Questions
Do I have to blanch all vegetables before freezing?
No — but almost. The USDA recommends blanching for virtually all vegetables because freezer temperatures slow but do not stop enzyme activity. The exceptions are vegetables with naturally low enzyme activity or those headed for cooked dishes where texture changes don't matter: raw chopped peppers, raw chopped onions, grated zucchini, whole tomatoes, and most fresh herbs can be frozen without blanching. Everything else should be blanched according to USDA-recommended times — underblanching stimulates enzymes rather than stopping them, which is actively worse than skipping the step entirely.
How long can I keep home-frozen vegetables?
The USDA National Center for Home Food Preservation recommends using home-frozen vegetables within 8 to 12 months for best quality. After that window, the food remains safe (frozen food doesn't spoil in a microbiological sense), but flavor, color, and texture decline noticeably. The 18-month figure appears in older sources but is not current USDA guidance. Storage at a steady 0°F — not a frost-free freezer that cycles temperature — preserves quality longest.
What's the difference between water blanching and steam blanching?
Water blanching submerges vegetables in a full rolling boil, using one gallon of water per pound of produce. Steam blanching suspends them above boiling water in a single layer, using steam as the heat source. Steam blanching takes roughly 50% longer to achieve the same enzyme inactivation, but it preserves more water-soluble vitamins (like vitamin C) because nothing is leaching into water. Both methods are accepted by the USDA NCHFP. Microwave blanching is not recommended because the uneven heating leaves pockets of under-inactivated enzymes.
Why does the ice bath need to be so cold?
Heat doesn't stop the moment vegetables leave the boiling water. The interior of a thick stalk or floret retains enough thermal energy to keep cooking for another minute or two — which means texture and vitamin degradation continue after the blanching timer goes off. An ice bath at 60°F or below halts this carry-over cooking almost immediately. Cooling should take the same amount of time as blanching: a three-minute blanch means three minutes in the ice bath. If the ice bath warms up from repeated batches, add more ice before the water climbs above 60°F.
What is flash freezing and why does it matter?
Flash freezing means spreading blanched, drained vegetables in a single layer on a baking sheet and freezing them solid — usually one to two hours — before transferring them to bags or containers. This prevents the pieces from fusing into a solid block that requires thawing the entire quantity to use any portion. It's the reason commercially frozen peas or corn kernels pour freely from the bag: each piece froze individually. At home, this step takes an extra hour but makes the difference between a bag you can measure from and a brick you have to chip at.
Can I refreeze vegetables after thawing?
As a rule, no. Thawing breaks down cell structure further, and refreezing drives additional moisture loss and texture degradation. Vegetables thawed in the refrigerator and not yet cooked can be refrozen, but the quality will be noticeably lower. A better approach is to freeze in single-use portions from the start — enough for one soup, one stir-fry, or one side dish — so nothing needs to be thawed and refrozen.
Sources and verification
Check current details with these primary or subject-authority sources before acting on the information.

Cashie Evans
Covers parenting and practical household topics with clear steps, safety notes and links to current guidance.




Leave a reply
Replying to