
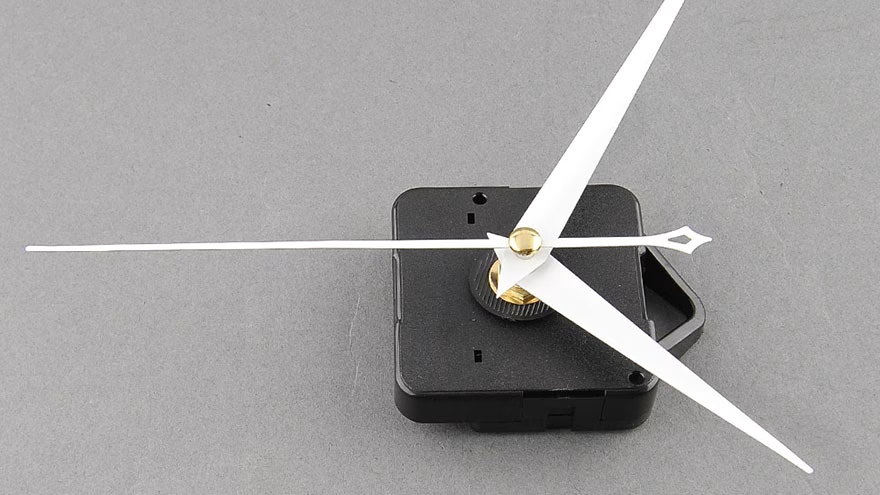
How to Replace Clock Hands is a small repair that can either take ten minutes or turn into bent metal, scratched dials, and hands that scrape each other. The key is to identify the clock type, buy hands that fit the movement, remove the old hands gently, and realign everything before closing the case.
This guide focuses on common wall, mantel, and battery quartz clocks. Antique, weight-driven, spring-driven, cuckoo, tall-case, or valuable clocks may need a clock repair professional. If the clock has sentimental or market value, slow down before using pliers.
Identify The Clock Movement
Quartz battery clocks often use press-on or nut-held hands attached to a movement behind the dial. Mechanical clocks can use different fittings and more delicate parts. Do not assume a hand kit fits every clock.
Clockworks' guide to choosing clock hands stresses matching the movement type, shaft dimensions, and hand style. Compatibility matters more than appearance.
Measure Before Buying Hands

Measure from the center hole to the tip of the minute hand, not the full diameter of the clock. The minute hand should fit the dial without hitting the case, glass, numbers, or trim. The hour hand should look proportional and clear the minute hand.
Esslinger's clock hand size guide starts with measuring the dial. That is useful because hands that are too long will look wrong and may stop the clock.
Gather Tools And Protect The Dial
Use needle-nose pliers, a small cup for nuts and washers, a soft towel, paper, and a camera. Take a photo before removing anything. Lay the clock face up on a towel so the frame and glass are protected.
If you are already doing home repairs, Livecub's wallpaper over plaster guide and drywall primer failure article share the same habit: preparation prevents visible damage.
Remove The Second Hand First
If the clock has a second hand, it usually pulls straight off or is held by a small cap. Pull near the center, not at the tip. Bending a hand near the end can make it wobble or scrape later.
Work over a towel so tiny parts do not bounce away. If a part resists, stop and inspect. Some clocks use a small retaining nut, and forcing the wrong piece can break the shaft.
Remove The Minute And Hour Hands

The minute hand is often held by a small nut. Turn it counterclockwise, remove it, then lift the minute hand straight up. The hour hand is often a friction fit and pulls straight off. Support the hand near the center.
Do not pry against a painted or paper dial without protection. A small scratch near the center may be visible forever. Use patience instead of force.
Install The New Hour Hand
Press the hour hand onto the hour shaft so it points exactly to 12. Keep it level. If it tilts, it may rub the dial or minute hand. Press near the center, not on the pointer end.
Before installing the minute hand, rotate the time-setting knob on the back to see that the hour shaft moves smoothly. If the movement feels gritty or loose, the problem may be the movement, not the hands.
Install The Minute Hand
Place the minute hand on its shaft at 12 and secure the nut if the design uses one. Tighten gently. Too loose and the hand slips; too tight and you may damage the movement or bind the hand.
Clockparts' hand installation guidance shows the basic sequence for installing hour and minute hands. Use the idea, but follow the hardware in front of you.
Check Clearance

Look from the side. The hour hand should clear the dial. The minute hand should clear the hour hand. The second hand, if used, should clear the minute hand and the glass. Small bends can stop a clock even when the movement works.
Gently adjust by bending near the center with fingers, not by twisting the tip. Move slowly. Thin clock hands bend easily and may crease.
Set And Test The Clock
Turn the time-setting knob, not the hands, through a full 12-hour cycle. Watch for rubbing at 12, 3, 6, and 9. Then install the battery or wind the clock according to its type and let it run with the cover open for a few minutes.
If hands stop at the same place each hour, clearance is likely the issue. If the hands never move, the movement or battery may be the issue.
When To Replace The Movement Too
If the clock loses time, stalls, clicks weakly, or has a damaged shaft, new hands will not fix the root problem. Battery quartz movements are often replaced as a unit. Mechanical clocks should be assessed by a repairer if they have value.
For general home troubleshooting mindset, Livecub's wood stress failure and wood edgeband failure articles show the same lesson: find the cause before replacing visible parts.
Choose The Right Hand Style
Replacement hands should fit the clock visually as well as mechanically. A kitchen wall clock can use simple modern hands. A mantel clock may look wrong with bright novelty hands. A schoolhouse clock may need bolder hands that can be read from across the room.
Check color against the dial. Black hands on a dark face disappear. Brass hands can disappear against warm gold numbers. If the clock sits in a bright room, glare from shiny hands may make it harder to read. Readability is part of the repair.
Fix Hands That Point To The Wrong Time
If the minute hand points to 12 but the hour hand sits between numbers, remove only the hour hand and press it back on at the correct hour. If the minute hand reaches 12 before or after the chime on a chiming clock, the issue may be more involved and may need model-specific adjustment.
For a basic battery clock, set both hands to 12 during installation, then use the rear knob to set the correct time. Do not spin the hands around from the front just because it feels faster. That can loosen the fit you just created.
Work Slowly Around Glass And Trim
Many clock cases open from the back, but some have front bezels, clips, or glass doors. Do not force a frame that seems stuck. Look for screws under felt pads, small tabs, or a removable back panel. Put each part in order as it comes off.
If the clock has curved glass, raised numbers, or a deep chapter ring, hand height matters. A hand that clears the dial in the center may still touch a raised marker near the edge. That is why a full 12-hour test is better than watching the second hand for one minute.
Keep The Old Parts Until The Clock Runs
Do not throw old hands, nuts, washers, or clips away immediately. They can confirm the fitting type if the new parts fail. They also help if you need to order a different length or ask a supplier what went wrong.
Place old parts in a labeled bag and keep them until the clock has run for at least a day. If the new hands slip after several hours, compare the center holes and hardware against the originals before blaming the movement.
Take one final photo after the clock is running. If it stops later, the photo helps you see whether a hand moved on the shaft, sagged toward the dial, or shifted after the case was closed.
Frequently Asked Questions
Can any clock hands fit any clock?
No. Hands must match movement type, shaft size, fitting shape, length, and clearance.
Why do my new hands stop moving?
They may be rubbing the dial, each other, or the glass, or the movement may be failing.
Should I move clock hands by hand?
Use the time-setting knob whenever possible. Forcing hands can bend them or damage the movement.
Can I cut clock hands shorter?
Sometimes, but it can look rough and affect balance. Buying the correct length is better.
Should antique clock hands be replaced?
Not casually. Original hands can affect value and character. Ask a clock repair professional first.
The Clean Repair
Replace clock hands by matching the movement, measuring the old hands, protecting the dial, removing parts in order, installing at 12, checking clearance, and testing a full cycle before closing the clock. Gentle work matters more than force.

Timothy Davidson
Edits step-by-step general-interest guides for clarity, realistic limits and source verification.



Leave a reply
Replying to