
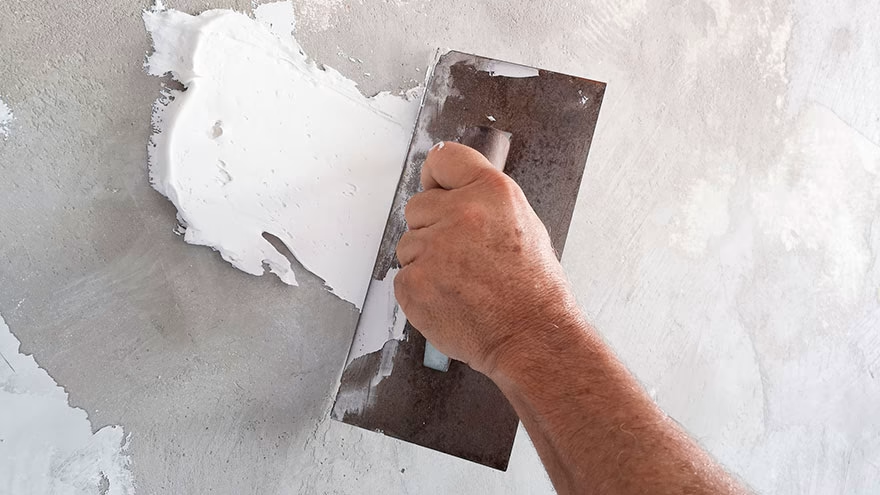
Why plaster walls need special preparation before wallpapering
Plaster walls look smooth, solid, and ready for decoration — and that surface confidence is exactly what trips people up. To successfully wallpaper over plaster walls, you need to understand how the material differs from drywall and prepare accordingly. The approach is fundamentally different, and the reasons are baked into the material itself.
Drywall is a standardized product: gypsum core, paper face, consistent porosity across every sheet. Plaster — particularly the lime-based three-coat plaster found in homes built before the 1950s — is nothing of the sort. It can be extremely hard in one spot and soft and chalky in another. Its pH tends to be high, especially in older lime plaster, which can react with certain adhesives. As Bob Vila notes, plaster is also considerably harder and more brittle than drywall — a quality that makes drilling and nailing difficult, and that also means repairs before papering require more care. More critically, plaster is moisture-sensitive in a specific way: when wallpaper paste hits an unprimed plaster surface, the wall drinks the moisture out of the adhesive almost instantly, leaving the paper poorly bonded before it even has a chance to set. The result shows up weeks later as lifting seams, bubbles, and panels that peel at the first sign of humidity.
The focus keyword for this project — wallpaper over plaster walls — describes something that is absolutely achievable, but only when the substrate is properly understood and prepared. Skip even one step, and the paste chemistry works against you rather than for you.
Assessing your plaster walls — what to fix first
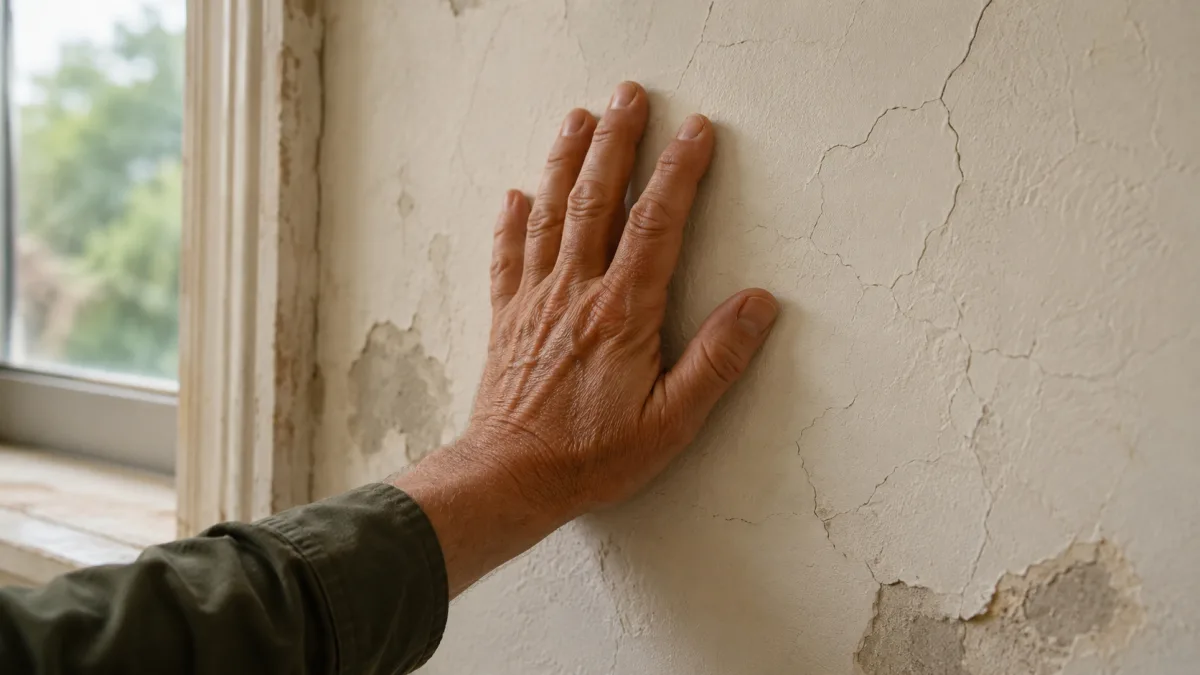
Before you open a roll of wallpaper, spend time reading the wall. Run your hand across the surface and press firmly in several spots. Plaster that feels soft or flexes when pressed may be delaminating from its lath backing — a serious structural issue that no amount of primer will fix. Tap the wall at intervals: a hollow thud instead of a solid knock indicates the plaster has separated. Sections like this need to be re-secured or replaced before papering, because the weight and moisture of wallpaper will finish the job of pulling them down.
Hairline cracks are common in old plaster and worth taking seriously. Plaster cracks because the building moves — thermal expansion, settlement, seasonal moisture cycling. Fill small cracks and holes with lightweight spackle, feathering the edges smooth. Larger cracks, especially those that reopen repeatedly, benefit from fiberglass mesh tape bedded in joint compound before filling. Whatever patching compound you use, allow a minimum of 24 hours of drying time before doing anything else. Damp compound under primer traps moisture and creates the exact bubbling problem you are trying to avoid.
If the wall carries decades of layered paint, test its adhesion before assuming it is a solid base. Press a piece of clear tape firmly over a scored X cut, then pull it off sharply. Paint that lifts with the tape signals a bonding failure that will transfer to your wallpaper paste. Sand or strip loose paint. If the paint layer is sound but gloss-finished, lightly scuff it with 120-grit sandpaper to give the primer tooth to grab.
Also remove all switch plates, outlet covers, and any picture hooks. Fill the screw holes. Wallpaper needs an uninterrupted surface to adhere uniformly, and hardware left in place creates pressure points that cause tearing when you trim.
Priming and sizing plaster for wallpapering
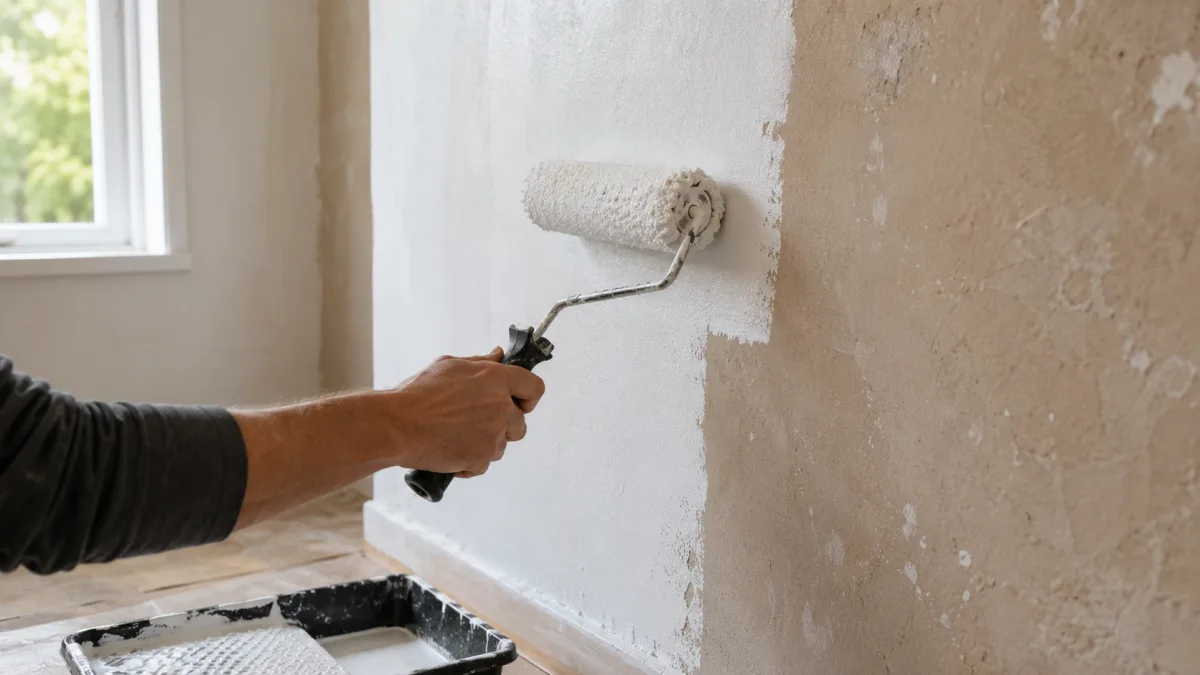
This is the step that separates a lasting installation from one that fails within a year.
Bare or freshly patched plaster is highly porous. When paste-based wallpaper adhesive contacts it, the plaster pulls the water content out of the adhesive so fast that the paste becomes tacky and unworkable almost immediately — you lose the slip needed to slide the panel into position, and the bond that forms is uneven and weak. A dedicated wallpaper primer, or an acrylic PVA-based primer, seals those pores and creates a surface that paste can bond to at a controlled rate. According to ROMAN Products, sizing's main purpose is to improve adhesion and stop the wall from absorbing moisture out of the adhesive prematurely, allowing you to position the wallpaper before it dries.
For old plaster that has been previously painted, ROMAN Products' PRO-909 Vinyl Prep Clear Primer is a professional standard — it dries clear, cleans up with water, and works over sound latex paint without reactivating old layers. For plaster where old wallpaper paste residue remains after stripping, PRO-999 Rx-35 Sealer/Primer addresses that porous, compromised surface directly. Whatever product you choose, apply it with a roller and allow it to cure fully — typically overnight.
After the primer dries, apply a sizing solution. Sizing is not the same as priming. Where primer seals the substrate, sizing creates a slightly tacky intermediate layer that slows the rate at which paste dries during hanging, giving you more time to slide each panel into exact position. Traditional starch-based sizing still works, but modern synthetic wall size — essentially diluted wallpaper paste — performs more reliably because it resists re-wetting and suits a wider range of adhesives. Mix it per the manufacturer's instructions and apply with a roller, working it into any remaining micro-texture in the plaster surface. Allow sizing to dry completely before hanging. Hanging into wet sizing is functionally the same mistake as skipping it.
Choosing the right wallpaper for plaster walls
Plaster's slight surface irregularity matters more than it does on drywall, so wallpaper type is not a trivial decision.
Non-woven wallpapers — made from a blend of synthetic and natural fibers pressed and bonded together — are the strongest choice for plaster walls on two counts. First, non-woven paper is dimensionally stable when wet, meaning it does not expand when paste or moisture contacts it. This matters on plaster because the surface is harder to realign on if a panel shifts. Second, non-woven papers use a paste-the-wall method: you apply adhesive directly to the wall rather than to the paper, which eliminates the booking and soaking step and reduces the total moisture introduced to the plaster surface.
Traditional paste-the-paper wallcoverings — paper, cotton, or vinyl-backed papers — require a different process. After pasting, these papers must be booked: folded pasted-side-to-pasted-side without creasing and left to rest for 3 to 8 minutes depending on paper weight. This allows even moisture absorption and expansion before the strip goes on the wall. Hanging a pasted paper that has not had time to expand means it continues expanding after it is on the wall, creating bubbles that may or may not flatten as the adhesive dries.
Peel-and-stick wallpaper is not recommended for plaster walls, particularly older ones. The pressure-sensitive adhesive on self-adhesive papers requires a very smooth, sealed, semi-gloss or satin-painted surface to achieve adequate bond strength. Old plaster — even primed plaster — rarely offers the uniformity that pressure-sensitive adhesives demand. The result is lifting edges within weeks. If you are committed to a removable wallpaper option on plaster, installing lining paper first with traditional paste is the more reliable route.
For those working on particularly old or uneven plaster, lining paper hung horizontally before the decorative layer creates a unified surface that bridges minor texture variations and significantly improves adhesion. It adds a step, but also adds durability. If you are also researching adaptive solutions for aging-in-place home design, our piece on adaptive furniture for the disabled covers related considerations for older homes undergoing renovation.
Measuring, marking, and cutting — planning before you paste
A common mistake on plaster walls specifically is starting from a corner and treating that corner as plumb. No corner in an old plaster home is perfectly square. Plaster was applied by hand over wood lath; the walls lean and bow in ways that accumulate error panel by panel. By the time you are three or four strips in, the pattern is visibly tilted relative to the windows and ceiling.
The correct approach is to establish your own true vertical using a spirit level and long straightedge, or a laser level. Mark a plumb line in pencil from ceiling to floor, positioned one panel width from where you plan to start. Every subsequent panel references back to this line. When you turn a corner, re-establish a new plumb line on the adjacent wall — never trust the corner itself as a guide. As This Old House notes, walls are rarely plumb in practice, making this independent vertical reference essential for keeping seams true as you work around the room.
For measuring and cutting, work from the actual floor-to-ceiling height of your room. Plaster ceilings are rarely level, so measure at three points — near both walls and in the center — and cut to the longest measurement, adding 2 inches at top and bottom for trim allowance.
If your wallpaper has a repeat pattern, plan before cutting a single strip. A straight match aligns each strip horizontally with its neighbor and wastes relatively little material. A drop repeat — where each successive panel drops by half the pattern repeat — requires more careful calculation, and the waste can add up to an extra roll in a standard room. Measure the pattern repeat printed on the label, calculate how many cuts per roll you get, and buy accordingly. Number your cut strips in sequence on the back edge in pencil before you open any paste. It takes 30 seconds and prevents a pattern crisis mid-room.
How to hang wallpaper on plaster — step by step
Start at your plumb line with your first strip. For paste-the-wall non-woven papers, apply adhesive to the primed and sized wall in a section slightly wider than your strip, working from ceiling to baseboard. Roll it on evenly without flooding — too much paste on plaster can re-soften the sizing layer. For paste-the-paper types, lay the strip face-down on a pasting table, apply paste evenly across the back including the edges, book the strip, and let it rest for the appropriate soak time before hanging.
Carry the strip to the wall folded. Unfold the top half and align the edge with your plumb line, leaving the overhang at the top. Press the paper lightly to the wall at the top and work down, keeping your eye on the vertical line as you go. Unfold the lower half and continue to the baseboard.
Smooth the paper from the center outward using a wallpaper smoothing brush or plastic smoother. Long, firm strokes push air from behind the paper toward the edges. Do not drag the smoother so hard that you stretch the paper — stretched paper shrinks as it dries, pulling away from seams. Wipe any paste that seeps onto the face of the paper with a clean, lightly damp sponge before it dries.
Trim the ceiling and baseboard overhangs with a sharp snap-off utility knife guided by a wide metal ruler or broad putty knife. Change the blade frequently — a dull blade tears rather than cuts, especially along the harder edge of sized plaster. After trimming, run the damp sponge along both cut edges to remove paste, then press the edges flat with a seam roller.
If you have encountered other failed primer or finish coat situations in your home, our guide to drywall primer failure explains the bonding chemistry behind why surface preparation is non-negotiable across all wet wall systems.
Creating perfect seams — the double-cut technique
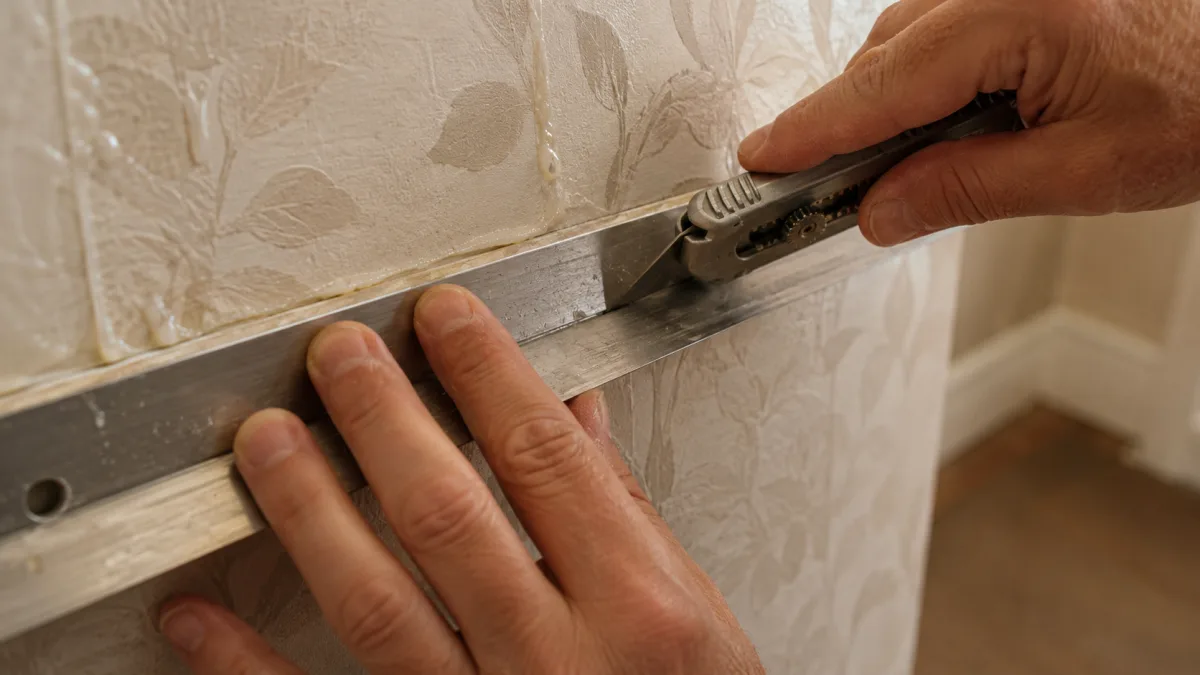
There are two ways to handle wallpaper seams: the butt seam and the double-cut seam.
A butt seam is exactly what it sounds like — two strips hung edge-to-edge with no overlap. When panels are cut cleanly and your plumb line is accurate, butt seams disappear. This is the standard DIY approach and works well on flat, uniform surfaces.
The double-cut seam is the professional technique for an invisible join even when paper edges are not factory-perfect — and it is especially valuable on plaster, where slight surface undulations can make butt seams cast a visible shadow line. Here is how it works.
Hang the first strip and allow it to firm up slightly — past the wet-sliding stage but not fully dry. Hang the second strip overlapping the first by about one inch, pattern-matched. Place a long metal straightedge firmly along the overlap and make a single vertical cut through both layers simultaneously with a sharp utility knife, running from ceiling to baseboard in one confident stroke. The blade cuts through both layers at exactly the same position.
Peel away the waste strip from the top layer. Then carefully lift the edge of the top strip, remove the underlying waste strip from beneath it, and press both cut edges back flat. Roll the seam firmly with a seam roller. The join is invisible because both edges were produced at the same instant, at the same location. On plaster specifically, keep straightedge pressure moderate — enough to guide the blade, not enough to compress the surface beneath.
For help understanding related structural precision work in older homes, our article on wood stress failure covers how older building materials respond to mechanical pressure and moisture loading.
Pattern matching and troubleshooting
Pattern matching on plaster walls introduces one variable smooth drywall does not: the wall itself may not be flat. Before committing to a bold pattern repeat on old plaster, hold a flashlight at a low angle across the surface. Any undulation shows as shadow. Significant waves may need skim-coating with joint compound before wallpaper becomes realistic.
Small bubbles during hanging should be worked toward the nearest edge with your smoother before the paste sets. Bubbles that appear after drying are usually caused by paste that dried too quickly — often because the sizing coat was thin or the primer undercured. Small dried bubbles can sometimes be re-moistened with a damp sponge held against the surface for a minute, then smoothed flat. Persistent bubbles require a pin prick, a small injection of fresh paste through the hole, and firm rolling with a seam roller.
Lifting seams after drying almost always trace back to primer or sizing deficiency. A seam roller with a small amount of fresh paste reactivates the bond for minor lifts. For a seam that has fully released, clean the area, apply fresh adhesive to both the paper and the wall, press firmly, and hold with painter's tape until dry.
Strippable wallpapers — most non-wovens qualify — are worth prioritizing on plaster for future renovations. They lift cleanly with no water, leaving the plaster surface intact. Paste-bonded papers removed from unprepared plaster can take chunks of the finish coat with them. If you are investing in original plaster you want to preserve, strippability earns its place as a selection criterion from the start. For further context on older property maintenance priorities, our overview of what a townhome is covers the surface care challenges common to period terrace and townhome walls.
Frequently Asked Questions
Can I wallpaper directly over old plaster without priming?
No. Bare or unprimed plaster absorbs moisture from wallpaper paste almost immediately, preventing the adhesive from bonding properly. The paste dries before achieving adequate grip, leading to lifting seams and bubbling within months. Priming with a wallpaper-specific or PVA-acrylic primer, followed by sizing, is the foundation the entire installation rests on — skipping it is the single most common reason wallpaper fails on plaster walls.
How do I know if my plaster is sound enough to wallpaper over?
Tap the wall in a grid pattern across its full surface. Solid plaster sounds dense and uniform; delaminated sections sound hollow. Press the wall firmly with your palm — if it flexes or gives, the plaster has separated from its lath backing and needs repair before any decoration proceeds. Also look for powdering or crumbling in the finish coat. Small stable cracks can be filled; structurally loose sections need replastering or a drywall overlay before wallpaper is an option.
What type of paste works best for wallpaper on plaster walls?
For non-woven paste-the-wall papers, a clear ready-mixed adhesive provides good working time and easy cleanup. For traditional paste-the-paper types, a methyl cellulose or synthetic polymer-based paste outperforms pure starch paste: it has better moisture resistance and a longer open time, giving you more opportunity to reposition panels. Always follow the wallpaper manufacturer's paste recommendation, since paper weight determines the viscosity you need.
How long should I wait after priming before hanging wallpaper?
Allow primer to cure for at least 24 hours — longer in cool or humid conditions. The sizing coat applied after priming also needs to dry fully, typically 2 to 4 hours at room temperature. In genuinely old lime plaster homes, 48 hours for the primer coat is the safer timeline. Hanging into incompletely cured primer reintroduces moisture to the plaster and defeats both products entirely.
Is peel-and-stick wallpaper suitable for plaster walls?
Generally not, especially on older or textured plaster. Pressure-sensitive adhesives need a very smooth, consistently sealed surface — ideally semi-gloss or satin-painted — to bond reliably. Old plaster, even when primed, tends to retain enough micro-texture to prevent consistent adhesive contact. Edge lifting typically begins within weeks, particularly in rooms with temperature fluctuation. If removability matters, install lining paper with traditional paste first, cure it fully, then apply peel-and-stick over the lined surface for a far more reliable result.

Timothy Davidson
Edits step-by-step general-interest guides for clarity, realistic limits and source verification.

Leave a reply
Replying to