
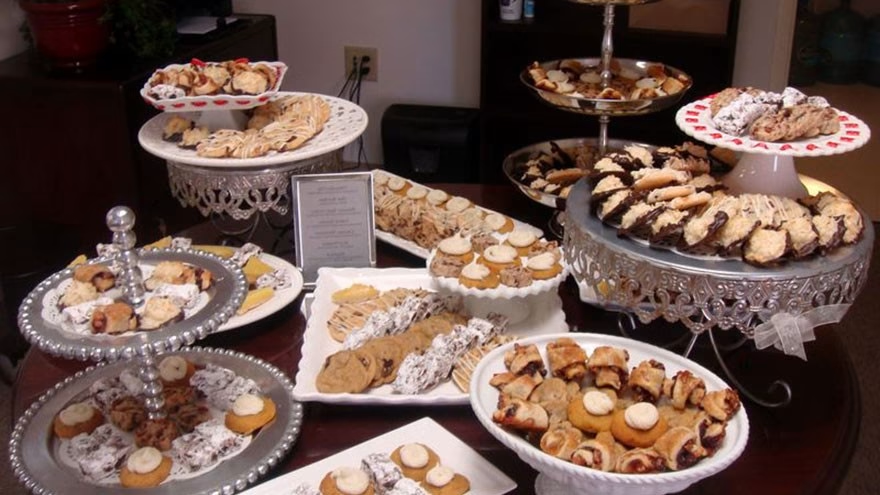
A well-built cookie display does two things at once: it keeps baked goods in their best condition and turns a table into something guests actually stop to look at. The cookie exchange party — a tradition with roots in mid-20th century American homemaker clubs, later popularized by magazines like Ladies' Home Journal — hinged on the display as much as the baking. How you present a Linzer versus a gingersnap tells a visitor something about care and craft before they've taken a single bite. This guide covers every major display format, the practical logic behind each one, and exactly what to do differently depending on whether your cookies are soft, crisp, or heavily iced.
Types of Cookie Displays
Not all cookie display options are built for the same purpose. A 3-tier acrylic stand suited to a bridal dessert table would look out of place at a backyard bake sale, and a flat tin that works beautifully for transport falls flat as a centerpiece. Understanding the core formats first saves a lot of rethinking later.
- Tiered stands: The most versatile option. A 3-tier metal or acrylic stand raises cookies to eye level and creates the impression of abundance even with a modest batch. Stack cookies at a slight angle around the edge of each tier, overlapping slightly, so guests can see variety at a glance.
- Cake plates and pedestals: A single pedestal plate — 10 to 12 inches in diameter — elevates a single type of cookie to centerpiece status. Pair two or three at different heights for a cohesive table without the bulk of a full tiered stand.
- Vintage tins: Round holiday tins ranging from 6 to 12 inches are ideal for transport and gifting. Inside, paper cupcake liners keep varieties separated and protect icing from scuffing. Arrange cookies upright like records in a crate rather than flat in a pile — you'll fit more in and they arrive in better shape.
- Charcuterie-style boards: A large wooden cutting board or slate cheese board arranged with four to six cookie types alongside small bowls of dipping chocolate, dried fruit, or candied nuts. The contrast in texture and color makes even simple drop cookies look deliberate. Start with the largest cookies placed first at the edges, then fill the center with smaller varieties.
- Clear acrylic boxes: Used frequently for premium gifting, these stackable boxes let the cookie be the packaging. A 6x6x2 inch acrylic box holding four decorated sugar cookies reads as a finished product, not an afterthought.
- Hanging displays: Reserved strictly for hard, fully dried cookies — gingerbread cutouts, biscotti, or royal-iced sugar cookies that have cured for at least 24 hours. Ribbon looped through a hole punched before baking lets cookies hang from a wooden dowel, a decorative ladder, or a ribbon-strung wire. The structural requirement is non-negotiable: a soft snickerdoodle will tear at the ribbon hole within minutes.
- Mason jars: A quart-sized mason jar filled with round cookies stacked vertically makes an instantly giftable package. The glass lets guests see every layer. Use a piece of parchment between each cookie to prevent sticking and keep crumbs from clouding the glass.
Choosing the Right Display for the Occasion
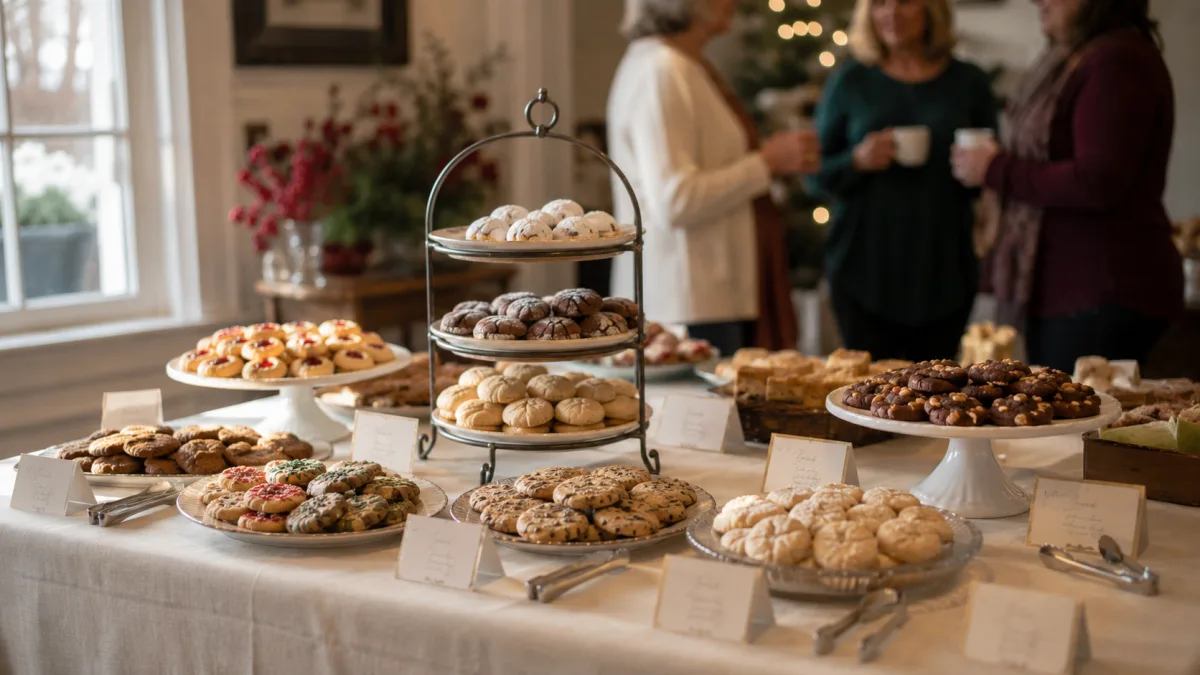
The format should match the context — not just in looks, but in function. A display that's beautiful but awkward to navigate will slow down a cookie swap line; one that ships well but photographs poorly wastes the effort of decorated cookies meant for gifting.
For a holiday party at home, a tiered stand paired with one or two pedestal plates gives you height variation without requiring any specialized equipment. A 6-to-8-foot rectangular table comfortably holds 10 to 15 cookie varieties in this configuration, with enough space for labels and small tongs so guests aren't reaching in bare-handed. Keep tablecloths in neutral tones — ivory linen or kraft paper — so that the color of the cookies reads clearly rather than competing with a busy pattern.
For a cookie exchange or swap, the display serves a practical sorting function. King Arthur Baking recommends labeling each cookie batch with a card noting baker name, cookie type, and any allergen flags like nuts or gluten. Flat platters work better here than tall tiered structures, because guests rotate around the table and need to access cookies from multiple sides without reaching awkwardly. A separate packaging station stocked with small boxes, wax bags, and twine keeps the swap itself from becoming chaotic.
For gifting, the display is the package. Vintage tins, acrylic boxes, and mason jars all travel well and require no additional wrapping. A decorative ribbon and a small tag with the cookie name and a best-by date (typically three to five days at room temperature) is enough. If you're giving iced sugar cookies, rigid window boxes — the kind with a cardboard bottom and clear acetate top — protect the decoration without pressing plastic directly against the icing surface.
For a table centerpiece, the goal shifts from access to impression. A hanging display above the table or a stacked pyramid of uniform cookies on a tall pedestal reads beautifully in a room but isn't practical for self-service. Treat it as visual decor and have a separate grab-and-go station nearby. If you enjoy entertaining with creative centerpieces, you might find similar ideas in our guide on ideas for memorial birthdays, where table design carries a lot of weight.
Soft Cookies, Hard Cookies, and Iced Cookies — Different Rules
The single most common display mistake is treating all cookies the same. Cookie type determines everything from how long they can sit uncovered, to whether they can be stacked, to how close together they should be placed on a board.
Soft cookies — chocolate chip, snickerdoodle, oatmeal raisin — lose moisture quickly once exposed to air. At room temperature in a dry room, an uncovered soft cookie will noticeably harden within two to three hours. For a party running longer than that, display a small portion at a time and replenish from a sealed container. Storing them alongside a slice of bread in the holding container is a legitimate trick: the bread slowly releases moisture that the cookies absorb, keeping texture intact. The bread will go hard within two days, but it does its job.
Hard or crisp cookies — biscotti, gingersnaps, shortbread, spritz — behave in exactly the opposite way. They're relatively stable on display, but they'll soften if stored in the same container as a soft cookie. The moisture migration goes one direction: soft cookies will sacrifice their texture to a crisp neighbor in a matter of hours. Keep them physically separate — different tiers, different platters, different tins — even if they're displayed side by side on the same table.
Iced and decorated cookies present the most handling constraints. Royal icing requires a full cure time of at least eight hours, and 24 hours is better before stacking or bagging. A surface that looks dry may still be tacky enough to lift a fingerprint or smear against the cookie above it. When displaying royal-iced cookies, single-layer arrangements with a small gap between each cookie prevent edge chipping and preserve the design. Buttercream-frosted cookies cannot be stacked at all without wax paper between each one, and even then, room-temperature buttercream softens in warm environments within 90 minutes. These cookies should be the last to go out and the first to be offered to guests.
Keeping Cookies Fresh During Display
Even the most polished display fails if the cookies taste stale. The variables that matter most are temperature, humidity, and time.
Most unfrosted baked cookies hold well at room temperature for three to five days in a sealed container, according to the USDA's food safety guidance. On display — meaning uncovered or loosely covered — that window shrinks considerably. A cookie with no protective covering in a heated room with low humidity can go noticeably stale in under two hours. The practical solution at a party is to display in small batches, rotating fresh cookies out from a sealed backup container every 60 to 90 minutes.
Temperature matters more than most people expect. Cookies left near a fireplace, a heating vent, or direct sunlight dry out faster than ones sitting in a cooler part of the room. Avoid setting your display table near any heat source, and if the party extends into warm weather, avoid direct sunlight entirely. Taste of Home's cookie storage guide makes the useful point that cookies should always cool completely before storage or display — trapped heat creates condensation, which ruins texture from the inside.
For cookies containing perishable fillings — cream cheese, custard, fresh fruit — the rules change. These need refrigeration and should not be left at room temperature beyond two hours. If your display includes filled sandwich cookies or cheesecake-topped bars, keep them in an ice-lined tray or serve them separately from the main table with a visible refrigeration note.
One more practical note: cookies that share a display absorb each other's aromas. A strongly spiced pfeffernüsse placed directly next to a delicate vanilla wafer for two hours will change the flavor of both. Group by flavor profile — citrus near citrus, spiced near spiced — rather than simply by color or size.
DIY Display Ideas Using Household Items
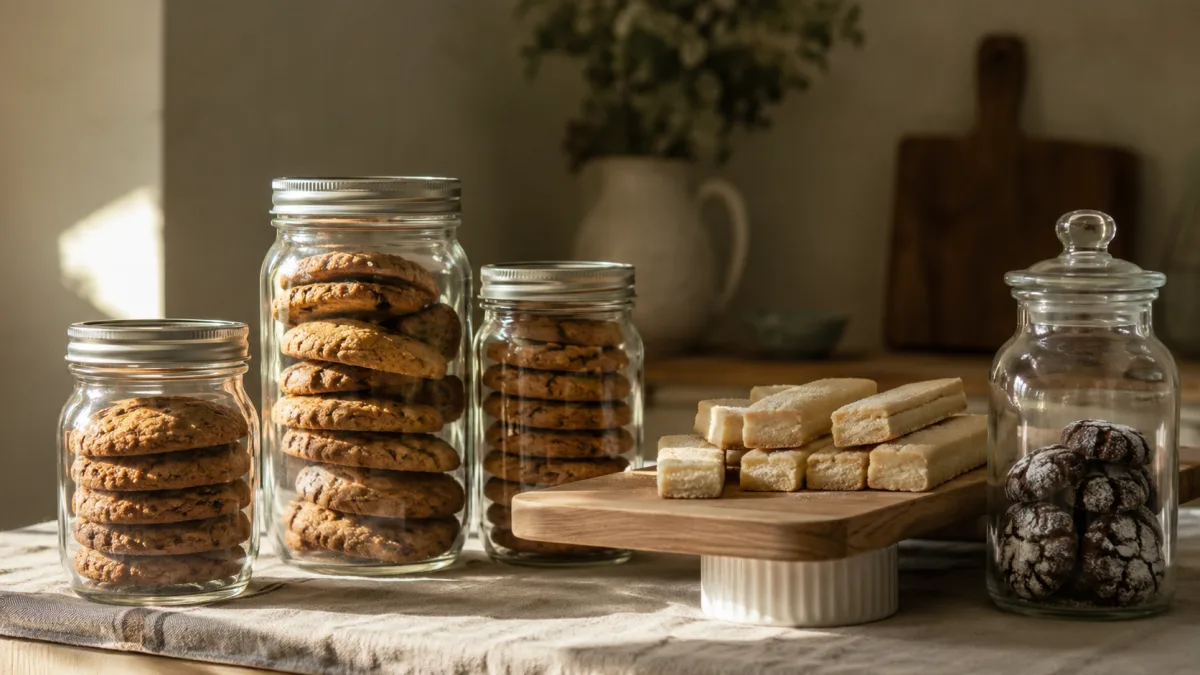
You don't need purpose-built equipment to put together a display worth photographing. The logic of any good cookie display comes down to three things: height variation, surface variety, and clear access. Most kitchens already have tools that deliver all three.
A repurposed cupcake tower — the kind that held 36 cupcakes at a child's birthday party — works well for uniform, soft cookies that don't require individual spacing. The tiers are already sized for individual portions. If the color is wrong, a coat of spray paint in matte gold, black, or white takes 20 minutes and transforms the piece entirely.
Stack upside-down ramekins or small bowls under a linen napkin to create instant risers on a flat table. Place a cutting board on top and you have a two-level display that took five minutes to assemble. A wooden ladder with flat rungs — leaned against a wall — can hold thin trays on each rung at staggered heights, turning vertical space into display space without crowding the table surface.
Glass jars of different heights — mason jars, apothecary jars, wide-mouth pickle jars — grouped in a cluster give a farmhouse-market look with no investment. Fill each with a different cookie type and you've created a display that's also its own packaging. This setup works particularly well when you're making something like Mom's Best Fudge Icing cookies where the chocolate color contrasts visually against clear glass.
Styling Tips: Height, Color, and Garnishes
A cookie table that looks considered rather than thrown together follows a few consistent principles, all of which take five minutes of planning before the first cookie goes down.
Height variation is the most important single factor. A table where every item sits at the same level reads as flat and uninviting. Aim for at least three distinct height levels: low (flat platters at table level), mid (6-to-8-inch cake stands or elevated cutting boards), and tall (12-inch pedestals or tiered structures). The eye naturally moves upward through a display arranged this way, and guests linger longer at tables with visual depth.
Color grouping produces a cleaner look than random placement. Arrange chocolate-based cookies — fudge crinkles, brownie bites, dark chocolate chippers — together, then pale cookies like snickerdoodles, shortbread, and vanilla crescents in a separate cluster. Iced cookies with red and green decoration go near each other, not scattered across the table. The contrast between clusters reads more clearly than a fully mixed arrangement.
Garnishes fill dead space and reinforce the occasion without competing with the cookies themselves. Sprigs of fresh rosemary, small pine cones, or cranberries scattered across a holiday table add texture without flavor conflict. For spring or summer displays, edible flowers — pansies, violets, or nasturtiums — work alongside pastel-iced cookies without looking forced. Avoid garnishes that shed (certain dried flowers, loose glitter) onto cookies guests are about to eat.
Labels deserve more attention than they typically get. A hand-lettered card naming each variety — even just "gingerbread" or "lemon shortbread" — helps guests make choices rather than grabbing blindly. It also signals that care went into the baking. At a cookie swap, labels should include the baker's name and any major allergens. Small chalkboard tags or folded index cards cost nothing and make a measurable difference to the experience.
If you're building out a full dessert spread, the cookie display benefits from pairing with complementary items. See how the same principles of height and variety apply when you're making a tiramisu as a centerpiece alongside your cookie table — the two elements anchor different ends of the dessert experience.
Cookie Displays for Gifting and Transport
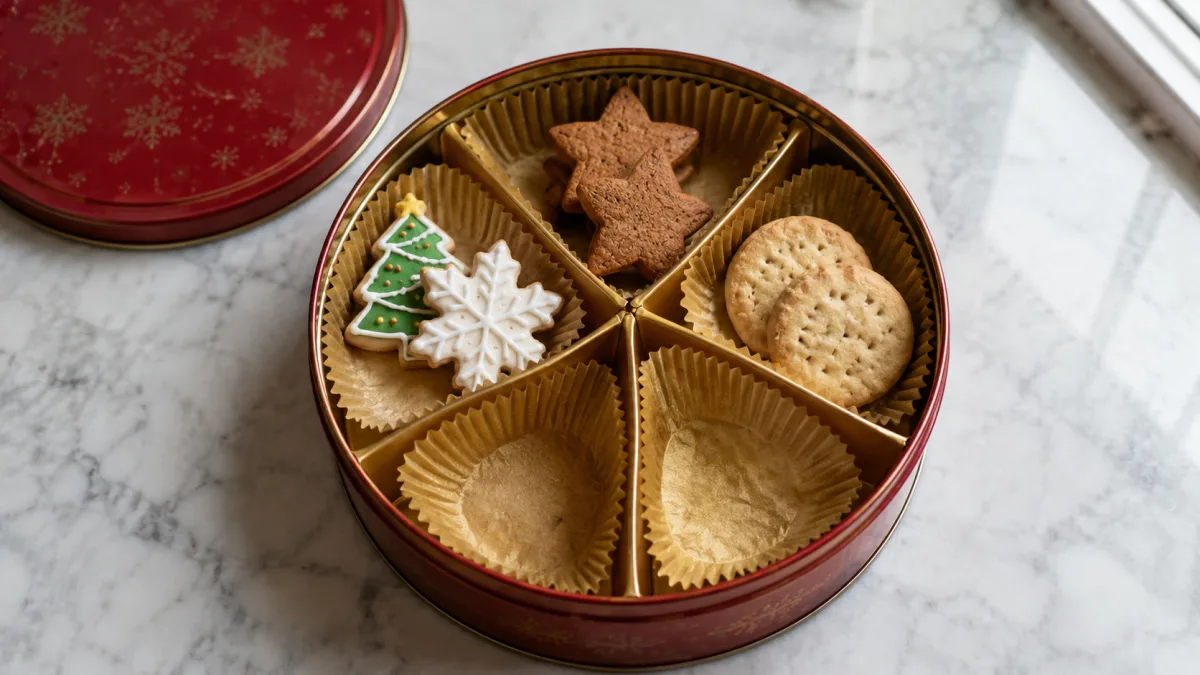
A display designed for gifting is also a display designed to survive movement. The best-looking gift tin that arrives with broken cookies and smeared icing fails at its basic job. These are the considerations that matter for any cookie that needs to travel.
Pack cookies in a single layer wherever possible. Two layers are acceptable if you place a sheet of parchment or wax paper between them — never stack iced cookies in direct contact with each other. Fill any empty space in the tin or box with crumpled parchment paper rather than leaving cookies to shift in transit. A cookie that moves around for 30 minutes in a car arrives with chipped edges and bruised icing, even when the overall distance was short.
Choose the right container for the cookie type. Hard shortbread and biscotti travel well in almost any container, including fabric-lined tins, because they're structurally sturdy. Decorated sugar cookies belong in rigid boxes with a non-contact covering — clear acetate, not cling wrap pressed directly against the icing. Soft bar cookies travel best left in the pan they were baked in, covered tightly with foil.
For a holiday gift that doubles as its own display when opened, a round tin with an internal divider creates a visual arrangement that the recipient sees the moment the lid comes off. Line the divider sections with paper cupcake cups in a contrasting color, then place one or two cookies per section. A 12-inch tin with six sections holds a meaningful variety — two each of three types — at a price point that doesn't require any additional wrapping. If you enjoy holiday cooking projects that become gifts, the same careful presentation logic applies when preparing a special occasion meal: the presentation is part of the gift.
Hosting a Cookie Swap: Display as Function
The cookie exchange format changes the display calculus. Here, the table isn't primarily decorative — it's operational. Guests rotate around it, evaluate options, and fill their own take-home boxes. That workflow determines how the display should be built.
Flat platters and shallow trays work better than tall tiered structures for a swap table, because guests need clear sightlines to all varieties at once. A 6-to-8-foot rectangular table can hold 12 to 15 varieties on a single level if you use consistent platter sizes. Label every batch with the cookie name, the baker, and any allergens. Small tongs or serving spoons next to each variety prevent guests from reaching in — which matters both for hygiene and for the integrity of decorated cookies that shouldn't be handled repeatedly.
Provide a separate packaging station off to the side: a stack of small boxes or bags, a ribbon, and optionally a label for guests to write their name as the gifter. This keeps the main display table from becoming cluttered with people's belongings and allows the swap itself to move efficiently. According to King Arthur Baking's cookie swap guide, planning for two hours of setup time on the day of the event is realistic — the display doesn't come together as quickly as it looks.
If you want to plan a memorable gathering that goes beyond just the cookies, it's worth thinking through the full event experience. Our article on how to throw a Hi-5 birthday party covers party flow and station setup in a way that applies directly to any sweets-centered event.
Frequently Asked Questions
How long can cookies sit out on display at a party?
Unfrosted cookies hold reasonable texture and flavor for two to three hours when left uncovered at room temperature in a typical indoor environment. Soft cookies deteriorate faster in dry or heated rooms. The safe approach is to display in small rotating batches — replenish from a sealed backup container every 60 to 90 minutes rather than putting out the full batch at the start. Cookies with perishable fillings like cream cheese or custard should not sit out beyond two hours.
What is the best display for iced sugar cookies?
A single-layer flat arrangement on a wide platter or a rigid-bottom box with clear acetate on top. Royal icing must be fully cured — allow 24 hours after decorating — before the cookies touch any surface other than parchment. Never press cling wrap directly onto royal icing; use a tent of plastic wrap or a hard lid that doesn't contact the surface. Buttercream-frosted cookies cannot be stacked and should be displayed and served within 90 minutes of coming to room temperature.
Can I reuse a cupcake stand as a cookie display?
Yes, and it works well. A standard 3-tier cupcake stand holds individual cookies at each cupcake position, creates useful height variation, and is already designed to be stable on a party table. If the color doesn't match your event, matte spray paint in gold, black, or white adheres well to both metal and plastic cupcake stands and dries in under 30 minutes with a standard aerosol formula.
How do I keep soft cookies from going stale during a long party?
Display small portions at a time and store the remainder in a sealed airtight container. Placing a slice of plain bread in the storage container helps maintain moisture — the bread goes stale so the cookies don't. At the display itself, a loose tent of plastic wrap draped over the platter between servings slows moisture loss. Room temperature, low humidity, and proximity to heat sources all accelerate drying; position your cookie table away from fireplaces, heating vents, and direct sunlight.
What types of cookies work best for a hanging display?
Only hard, fully dried cookies can support the mechanical stress of hanging. Gingerbread cutouts, thick royal-iced sugar cookies, and biscotti are the most common choices. The hole for the ribbon should be punched or cut before baking, not after — a post-bake hole in a fully hardened cookie will crack the surrounding structure. Allow the cookies to cure completely (24 hours minimum after icing if decorated) before hanging. Standard 1/4-inch grosgrain ribbon is strong enough for most gingerbread cutouts up to about 4 inches in diameter.
What's the best way to separate different cookie types on a shared display?
Use distinct physical boundaries: separate platters, different tiers, or small bowls acting as dividers on a charcuterie-style board. This matters for two reasons — flavor migration and texture transfer. A strongly spiced cookie placed directly against a delicate vanilla cookie will transfer aroma in under two hours. A soft cookie stored against a crisp one will soften it through moisture migration. Even on a visually unified display, keep varieties at least two inches apart and avoid stacking soft and crisp types in the same tier.
How do I display cookies at a cookie exchange without them looking amateur?
Consistent platter sizes create visual order. Use the same size plate or tray for each variety rather than a mix of whatever's available. Label every batch with a handwritten card — even simple index cards look intentional when they're consistent. Use serving tongs rather than leaving the cookies for bare-hand access. Group similar-colored cookies near each other so the overall table reads as curated rather than random. A neutral tablecloth (white, ivory, or kraft paper) makes colored icing and decorated surfaces pop rather than compete.

Cashie Evans
Covers parenting and practical household topics with clear steps, safety notes and links to current guidance.




Leave a reply
Replying to